Are you excited to join the fun world of chatbot creation? Whether this is your first chatbot project or you're a seasoned developer, you've come to the right place.
In this guide, we'll help you through each step of building your chatbot using Google Dialogflow chatbot. From signing up to designing engaging conversations, we've got all the info you need.
We'll start by setting up your Dialogflow account. Then, we'll cover key concepts like intents, entities, and contexts - think of them as the building blocks of chatbots.
We'll also show you how to configure settings and develop dynamic conversation flows. Google Dialogflow chatbot makes it easy to integrate with platforms people use every day.
Along the way, you'll learn about Dialogflow's natural language features and rich response options. We don't want any bugs, so we'll go over testing and debugging too.
By the end, you'll have the knowledge to deploy your Dialogflow chatbot into the world.
Excited?
Let's get started with a quick overview of the Dialogflow chatbot and its benefits.
Overview of DialogFlow and Its Benefits
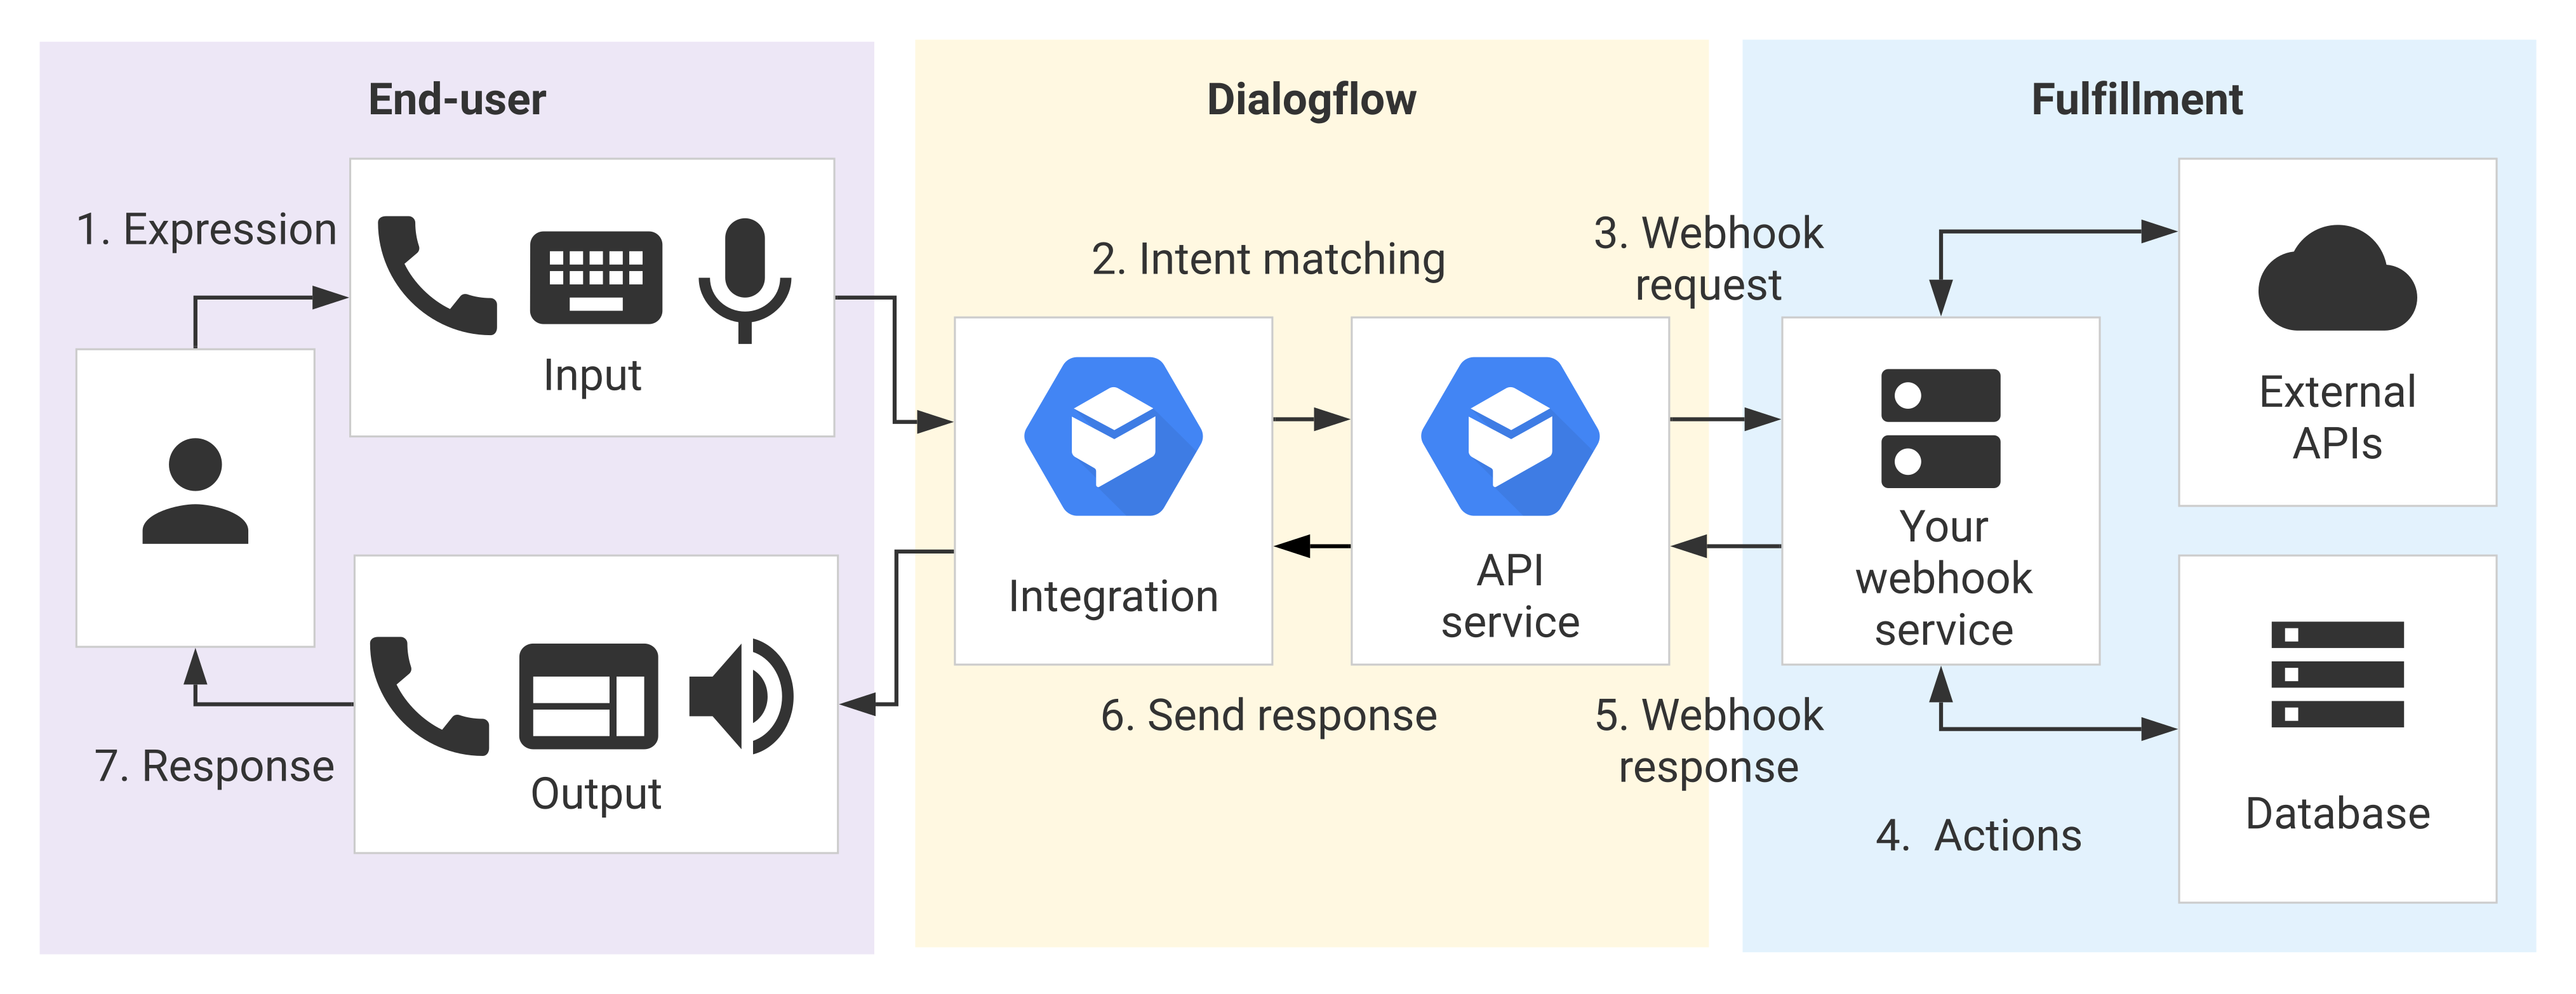
Before we move into creating a DialogFlow chatbot, let's clarify who can use it:
DialogFlow, powered by Google's machine learning, allows both developers and non-developers to build conversational agents that can understand and respond to natural language.
Its visual drag-and-drop interface provides templates that make it possible for marketers, customer support teams, and others to set up basic chatbots without coding.
More complex integrations and capabilities may require a developer
Below are the Google DialogFlow chatbot’s benefits:
- Natural Language Understanding: DialogFlow chatbot can comprehend user inputs in a conversational manner, allowing for more interactive and engaging conversations with your chatbot.
- Easy Integration: DialogFlow seamlessly integrates with popular messaging platforms like Facebook Messenger, Slack, and more, making it accessible to a wide range of users.
- Rich Responses: With the Google DialogFlow chatbot, you can create dynamic and visually appealing responses using rich response options like text, images, cards, and even suggestions.
Now that we know the basics let's dive into the steps of creating your very own DialogFlow chatbot!
Step 1
Setting Up Your DialogFlow Account
We have to create a Dialogflow account first. It simply takes a few minutes, so don't worry. After that, you'll be prepared to begin creating your conversational agent.
Let's join up now so we can get to the exciting stuff! If you stick with us, We'll lead you through the simple registration procedure.
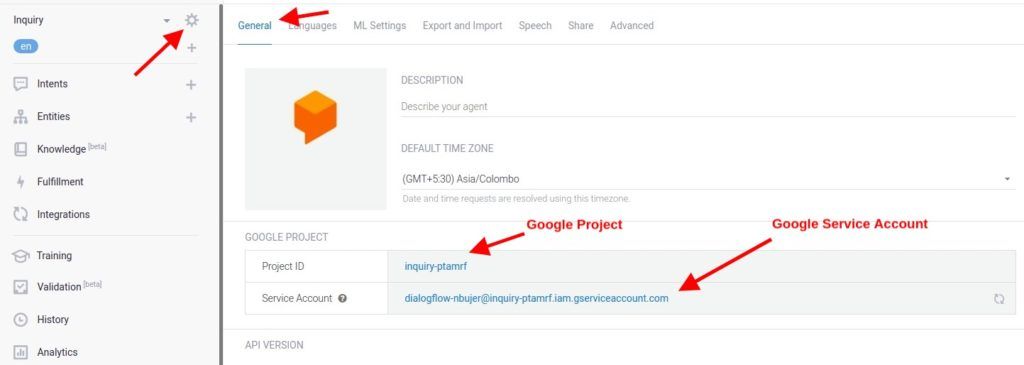
Creating a DialogFlow Account and Accessing the Platform
To get started, head over to the DialogFlow website and create your account. Once you've completed the registration process, you'll gain access to the DialogFlow platform, where the magic happens.
Understanding the Essential Components and Terminology in DialogFlow
Before we start designing our Google DialogFlow chatbot, we must familiarize ourselves with the essential components and terminology in DialogFlow.
Some key terms to know are:
- Intents: Intents represent the goals or actions users want to achieve through their conversations with the chatbot. They define what the user wants and how the chatbot should respond.
- Entities: Entities are employed to recognize and extract valuable data from user inputs. They help capture data like dates, names, and locations, allowing your chatbot to provide personalized and relevant responses.
- Contexts: Contexts are used to maintain the state of a conversation. They enable the chatbot to understand user inputs in the context of ongoing interactions, enhancing the overall conversational experience.
Configuring the Necessary Settings for Your Chatbot Project
Before we start building conversations, it's essential to configure the necessary settings for your chatbot project.
This includes defining the default language, time zone, and other project-specific settings that will shape the behavior of your chatbot.
Now that we have our account set up and the stage is set, it's time to design our DialogFlow chatbot's conversation flows and intents.
Step 2
Designing Conversation Flows and Intents
Creating engaging and dynamic conversation flows is at the heart of building a successful chatbot.
By defining conversational flows and user intents, we can ensure that our chatbot understands user requests and provides relevant responses.
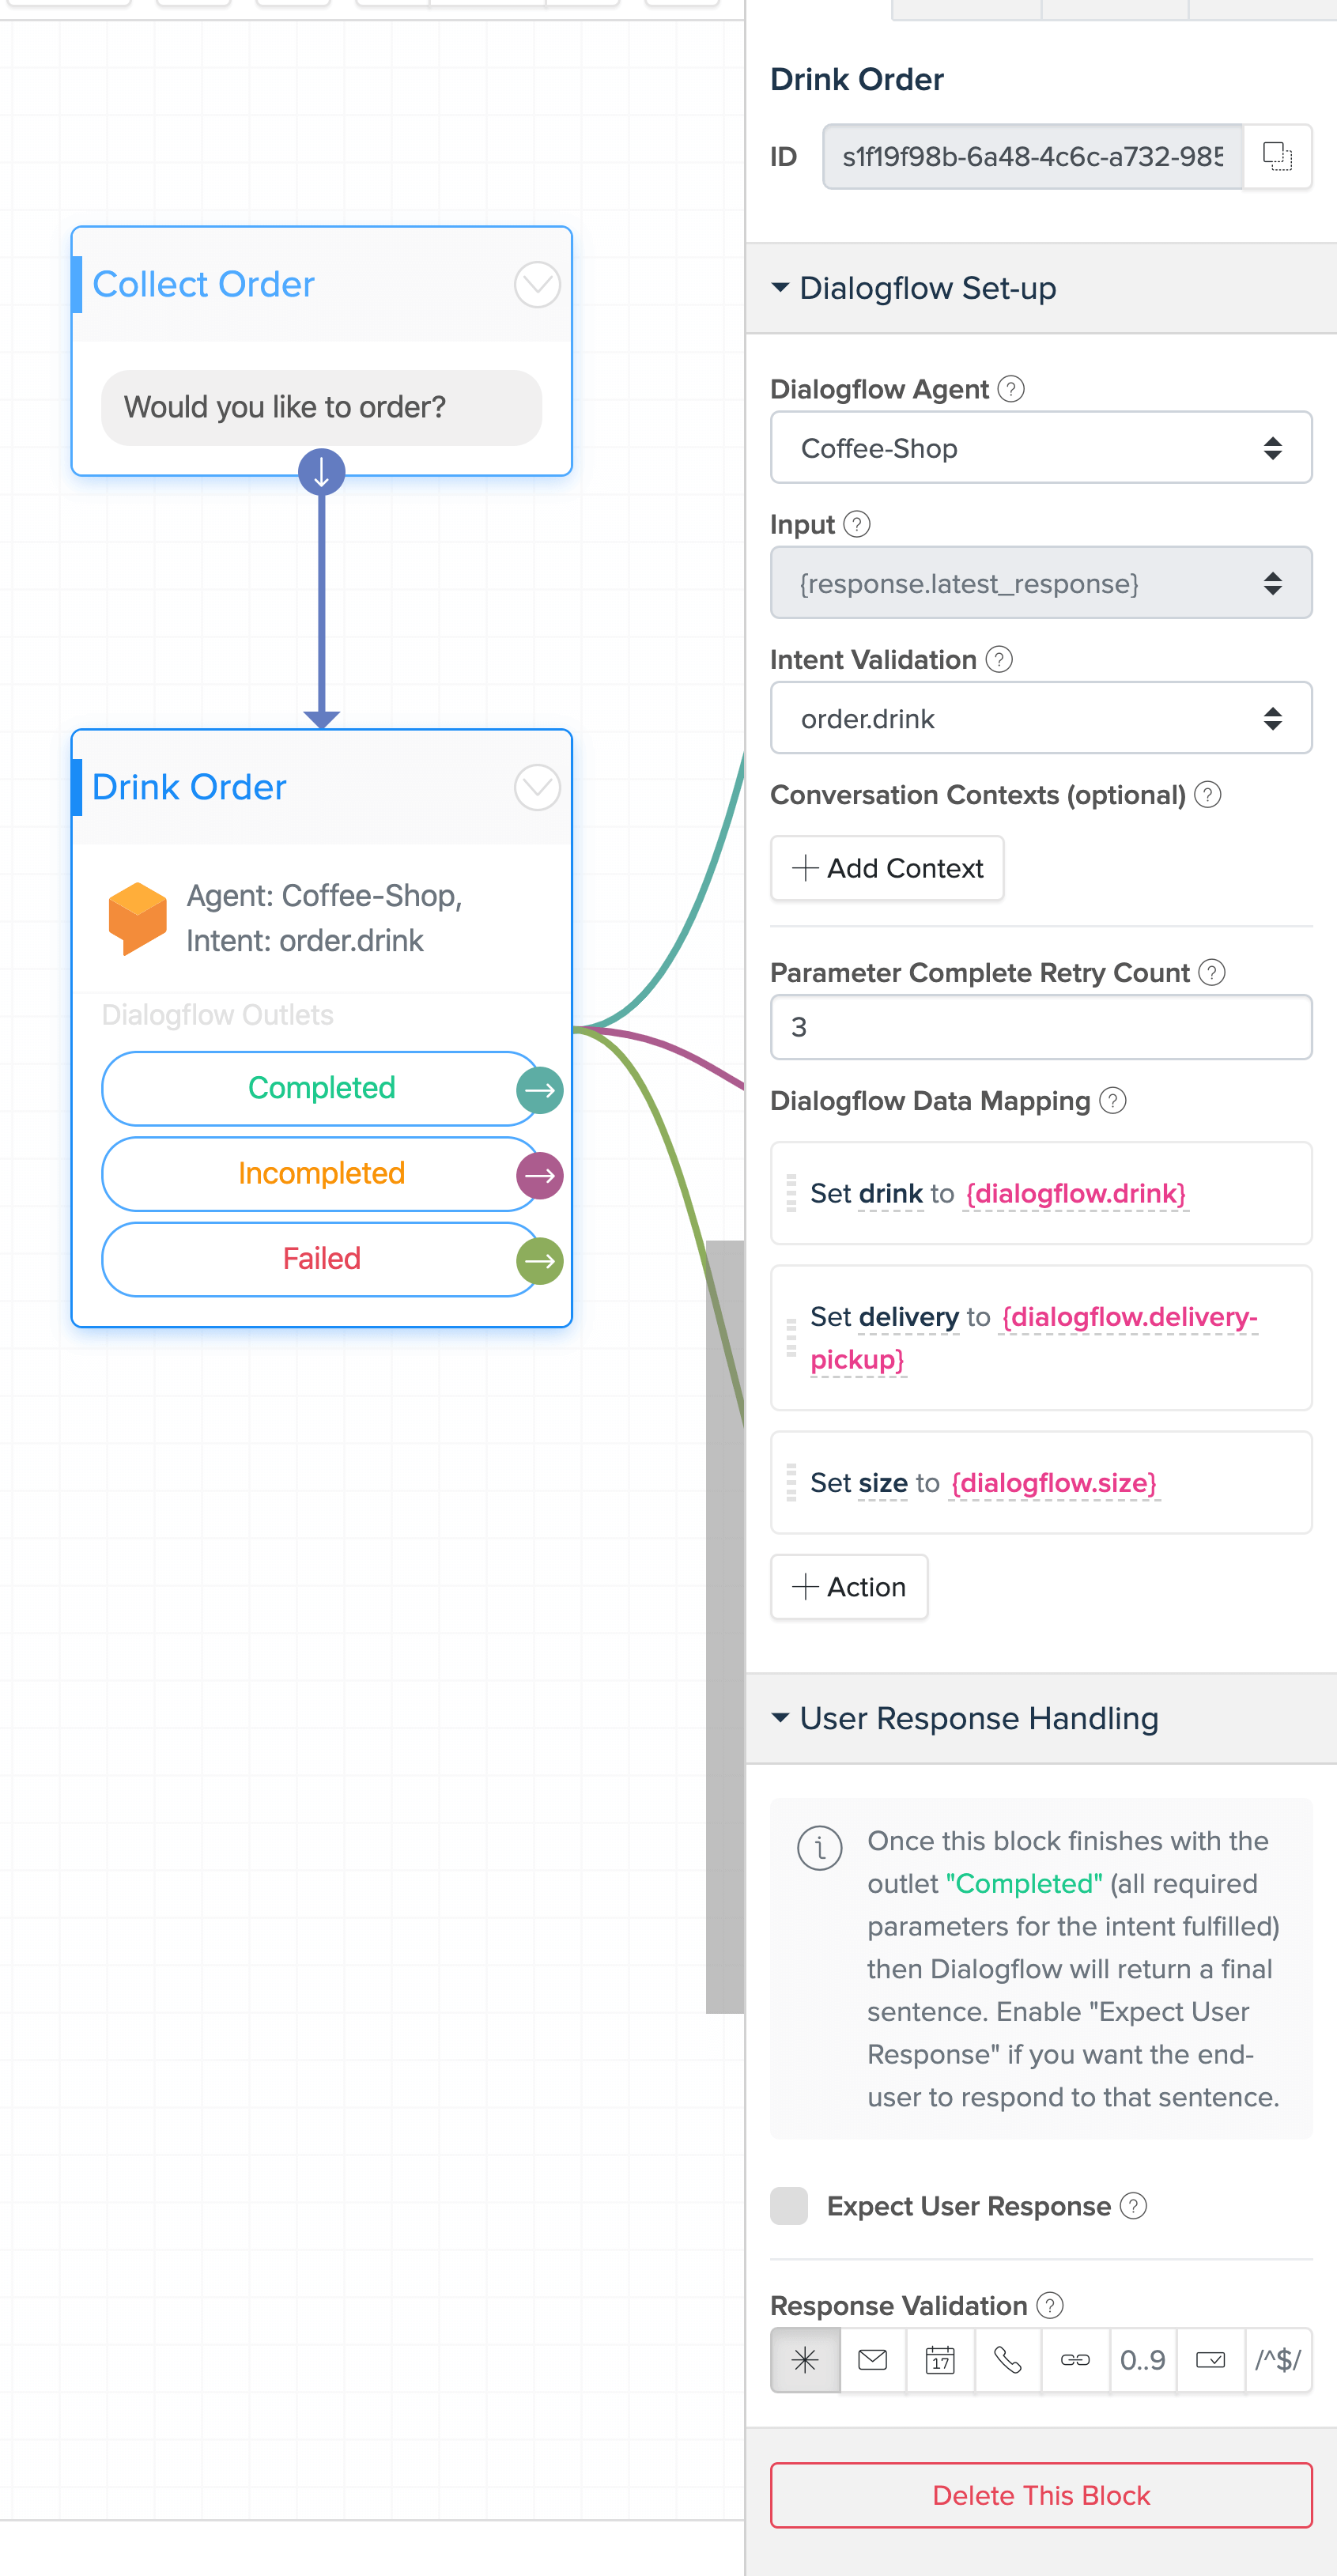
Defining Conversational Flows and User Intents for Your Chatbot
To get started, think about the various user interactions and the goals they want to accomplish when engaging with your chatbot.
Each user goal can be mapped to an intent, which represents the specific action the chatbot needs to take.
Creating Custom Intents and Training Phrases
Visit the DialogFlow website to get going and register for an account. The DialogFlow platform, where the magic happens, will be accessible to you after the registration procedure.
Utilizing Entities to Capture and Extract Important User Information
Entities are like the building blocks of conversation. They help us capture and extract meaningful information from user inputs.
Google DialogFlow chatbot provides predefined system entities, but you can also create custom entities tailored to your chatbot's specific needs.
In the next section, we will explore how to create engaging and dynamic responses for your chatbot using the Google DialogFlow chatbot platform.
Suggested Reading:
Step 3
Building Responses and Fulfillment
In this section of our comprehensive guide, we will explore how to create engaging and dynamic responses for your chatbot using Google's DialogFlow platform.
Get ready to take your chatbot to the next level!
Creating Dynamic and Engaging Responses for Your Chatbot
Gone are the days of boring and monotonous chatbot responses. With DialogFlow's rich response options, you can create visually appealing and interactive conversations.
From simple text responses to images, cards, and even suggestions, the possibilities are endless.
Let your chatbot's personality shine through!
Utilizing Dialogflow's Rich Response Options
DialogFlow offers many rich response options to make your conversations come alive. Including images in your responses can provide visual context and enhance the user experience.
Conversely, cards allow you to display structured information in a compact and visually appealing format.
Feel free to explore the different response options and find what works best for your chatbot.
Implementing Fulfillment to Extend Chatbot Capabilities
Imagine if your chatbot could go beyond simple responses and perform backend tasks or integrate with external APIs. Well, with DialogFlow's fulfillment feature, this becomes a reality.
By implementing fulfillment, you can extend your chatbot's capabilities and make it a powerful assistant.
You can integrate with databases, perform calculations, fetch real-time information, and more. The sky's the limit!
Now, In the next section, we'll see how Dialogflow makes it a breeze to use contexts.
Suggested Reading:
Rasa vs DialogFlow: Choosing the Right Chatbot Builder
Step 4
Enhancing Chatbot Understanding with Contexts
Context is so important for natural conversations, right? By implementing and managing contexts, your chatbot will have a much better understanding of what the user wants.
We are excited to show you these tools - they really help move the discussion along in a smooth way. Let us know if you have any other questions!
Understanding the Importance of Context in Chatbot Conversations
Context plays a crucial role in maintaining the flow of a conversation. Just like humans, chatbots need context to understand user inputs better.
Context provides valuable information about the current state of the conversation, enabling the chatbot to respond more accurately and contextually.
It helps bridge the gap between individual user queries and creates a seamless conversational experience.
Implementing and Managing Contexts
In DialogFlow, implementing and managing contexts is a breeze. You can set contexts within intents to carry information throughout the conversation.
By defining input and output contexts, you ensure the chatbot understands user requests within the appropriate context and provides relevant responses.
Using Context Lifespan and Parameter Mapping
One of the key features of DialogFlow is the ability to set a context's lifespan. This lets you control how long a context remains active during a conversation.
By mapping parameters within contexts, you can easily extract and store important information from user inputs.
This makes it easier to maintain the flow of the conversation and provide accurate responses based on user context.
After enhancement, it's time to test your chatbot. So let us start testing our chatbot.
Step 5
Testing and Debugging Your Chatbot
Alright, time to put your chatbot skills to the test! This is where the real fun begins. We'll go over Dialogflow's built-in simulator to interact with your bot.
Nothing like a friendly chat to work out any kinks, right? If all goes well, you'll be deploying in no time.
But if any issues come up, no worries - We'll show you some debugging tricks.
Between the two of us, we are sure we can troubleshoot anything. Let's do this!
Testing Your Chatbot in the DialogFlow Simulator and Beyond
It's time to put your chatbot to the test! DialogFlow provides a built-in simulator that allows you to interact with your chatbot and evaluate its responses.
Take this opportunity to test different conversational flows, try out different user inputs, and make sure your chatbot understands and responds accurately.
But don't stop there—real-life testing on different platforms and with real users is essential to ensure a smooth user experience.
Debugging and Troubleshooting Common Issues
Even the most well-designed chatbots might encounter a glitch or two.
That's where the art of debugging comes in! DialogFlow offers helpful tools for diagnosing and resolving issues.
Keep an eye out for any unexpected behavior, missing responses, or misinterpretations.
Debugging allows you to fine-tune your chatbot's responses and improve its performance.
Iterating and Improving Based on User Feedback and Insights
The true test of a chatbot's success lies in user satisfaction. Gather user feedback to understand what works and what needs improvement.
Look for patterns in user queries, common stumbling points, or requests for additional features.
Leverage this invaluable information to iterate and enhance your chatbot, making it smarter, more intuitive, and aligned with user needs.
Step 6
Deploying and Integrating Your Chatbot
Are you looking to take your chatbot to the next level? Wondering how to get it in front of more users and integrate it into your current systems? This section will walk you through the steps to deploy your chatbot and integrate it seamlessly.
We'll cover hosting options, common integration patterns, and tips to ensure a smooth experience for your users. Let's get started!
Preparing Your Chatbot for Deployment
Before your chatbot can leave the nest, it needs a bit of preparation. Make sure your chatbot is fully trained and that you've thoroughly tested it for optimal performance.
Double-check that all responses are accurate, relevant, and aligned with your chatbot's purpose.
A little extra effort in the preparation phase will go a long way in ensuring a successful deployment.
Integrating Your Chatbot with Various Messaging Platforms
Now comes the exciting part—integrating your chatbot with popular messaging platforms.
DialogFlow makes this process a breeze by offering seamless integration options with platforms like Facebook Messenger, Slack, and more.
These integrations allow users to interact with your chatbot through their preferred medium, expanding your reach and providing a user-friendly experience on multiple channels.
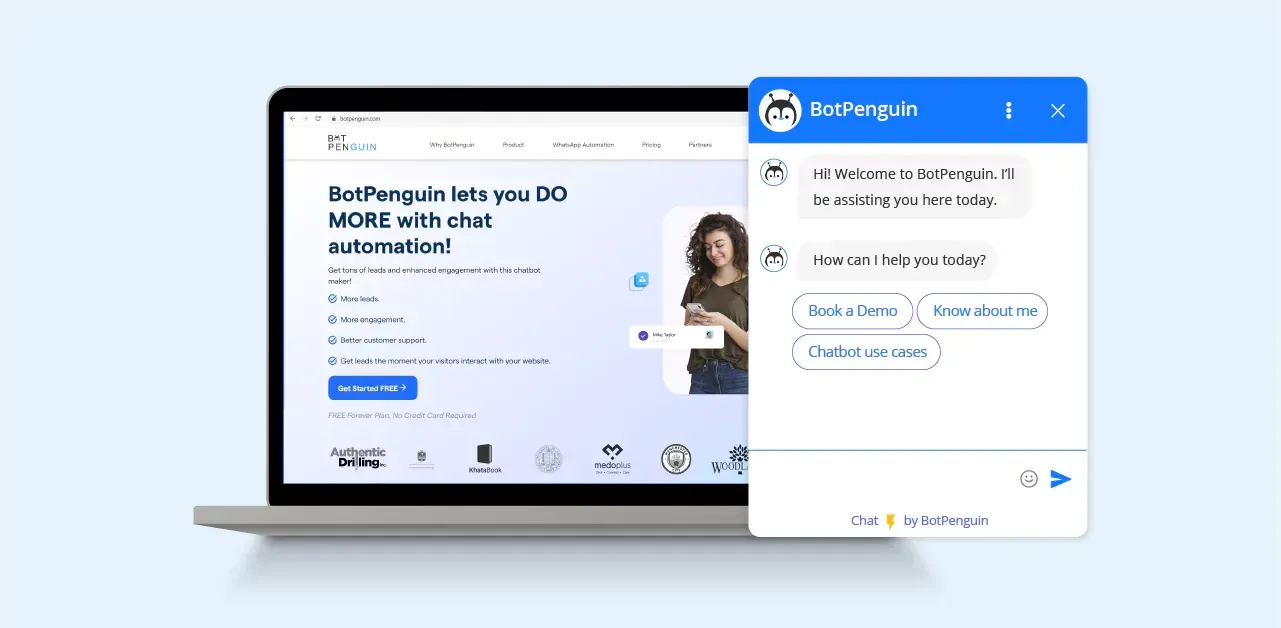
Talking about integrating chatbots with multiple messaging platforms, there is one more platform that makes the process super sweet. And that is BotPenguin, the home of chatbot solutions.
With BotPenguin you get to have these intelligent AI-powered chatbots across multiple platforms. And for the sweet dish, you have this unified inbox to keep a check of all your different platform's chatbot messages in one place. The choice is easy and the offer is tempting:
Managing and Monitoring Performance and Analytics
Once your chatbot is up and running, it's important to keep an eye on its performance and monitor analytics.
DialogFlow provides valuable insights into user interactions, response times, and overall usage.
By analyzing this data, you can continuously refine and optimize your chatbot to deliver an even better user experience.
Conclusion
You've made it to the end of our step-by-step guide on building a DialogFlow chatbot.
We hope this guide has demystified the process of building a chatbot and given you the confidence to start building your conversational AI project.
Whether you're a beginner or an experienced developer, there's always something new to learn and explore within DialogFlow. Remember, building a chatbot is an iterative process.
Feel free to experiment, grasp user feedback, and continuously improve your chatbot. With some creativity and DialogFlow's powerful tools, you can create chatbots that delight and assist users.
Frequently Asked Questions (FAQs)
Can I integrate my DialogFlow chatbot with popular messaging platforms like Facebook Messenger?
Yes, DialogFlow offers integrations with various messaging platforms, including Facebook Messenger, allowing you to reach a wider audience.
What are intents and entities in DialogFlow, and how do I use them?
Intents define the purpose of user input, while entities extract important information from user messages. You configure these to train your chatbot in understanding user queries effectively.
Is programming knowledge required to create a Google DialogFlow chatbot?
No, DialogFlow provides a user-friendly, visual interface for building chatbots. However, if you want to add more advanced functionality, coding knowledge can be beneficial.
How can I make my own Google DialogFlow chatbot more conversational and engaging?
You can enhance the conversational flow by adding follow-up intents, rich responses, and small talk options, creating a more engaging chatbot experience.
What is fulfillment in DialogFlow, and when should I use it?
Fulfillment allows your chatbot to perform actions or fetch data from external sources. Use it when you need your chatbot to do more than just respond to user input.
How do I test my Google DialogFlow chatbot to ensure it works correctly?
DialogFlow provides a testing environment where you can simulate user interactions and evaluate your chatbot's responses and behavior.

