Introduction
The Troubled ticket system is pointless. Yes, you read that right. Many believe they just create more confusion. But what if there’s a way to make them work for you? Imagine solving issues faster and with less hassle. This guide will show you how to master the art of the trouble ticket system. We’ll cover practical tips and smart strategies. No fluff, just clear steps to make your life easier. Let’s dive in and turn those online trouble ticket system from a headache into a helpful tool.
Creating a Trouble Ticket
Creating a trouble ticket is an essential process in resolving technical issues efficiently. It helps track problems, ensure accountability, and streamline the resolution process.
Information to Include
When creating a trouble ticket, it is crucial to include all necessary information to facilitate a quick resolution.
- Contact Information: Include your name, department, and contact details. This helps the support team reach you if they need more information or to update you on the progress.
- Problem Description: Describe the issue in detail. Avoid vague terms. Specify what you were doing when the problem occurred and what steps you took to try and resolve it.
- Impact: Explain how the issue affects your work. This helps prioritize the ticket based on urgency.
- Attachments: If possible, attach screenshots or error logs. These provide visual or textual evidence that can expedite the troubleshooting process.
Steps to Create a Trouble Ticket Software
Here are the steps for creating a trouble ticket software:
- Access the Ticketing System: Log into your company's ticketing system through the designated platform or application.
- Select the Issue Type: Choose the category that best describes your issue, such as software, hardware, network, or other.
- Fill in the Details: Complete the form with all required information as detailed above.
- Submit: Click the submit button to send your trouble ticket to the support team.
Gathering Necessary Information
Before submitting a trouble ticket software, gather all relevant details to ensure the support team has everything they need to resolve the issue. This includes:
- Device Details: Note the type of device, operating system, and software versions.
- Error Messages: Record any error messages exactly as they appear.
- Replication Steps: Detail the steps to reproduce the issue. This helps the support team understand and potentially replicate the problem.
Submitting the Ticket
Once you have gathered all necessary information, submitting the ticket is straightforward. Ensure all fields are filled out correctly, attach any relevant files, and click submit. After submission, you will typically receive a confirmation with a ticket number for tracking.
Managing Trouble Tickets

Effectively managing a trouble ticket system is crucial to ensure timely resolution and maintain smooth operations.
Tracking the Status of a Ticket

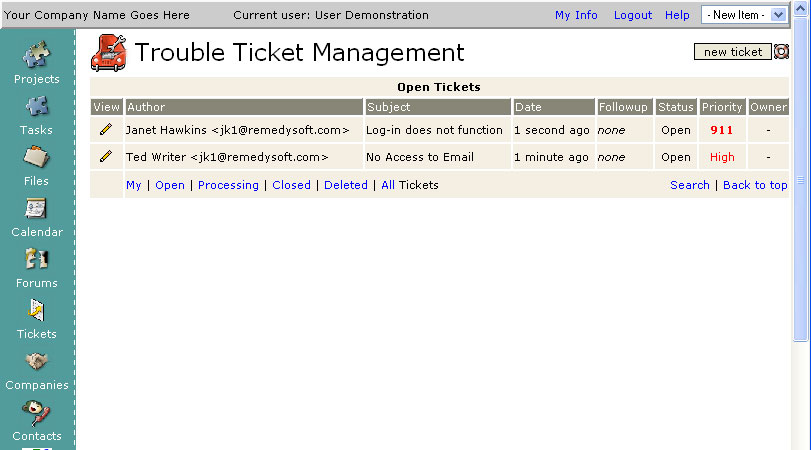
Once an online trouble ticket system is submitted, it is important to track its status regularly.
- Checking Updates: Log into the ticketing system to see the latest updates. Look for status changes like "In Progress," "Awaiting Customer Response," or "Resolved."
- Email Notifications: Pay attention to email notifications from the support team. These emails often provide important updates and next steps.
Communication with Support Teams
Clear communication with support teams can significantly expedite the resolution process.
- Provide Timely Responses: If the support team requests additional information, respond promptly. This keeps the process moving without unnecessary delays.
- Clarify Issues: If you receive a response that is unclear, ask for clarification. Understanding each step helps in accurately addressing the problem.
Suggested Reading: Ticket Routing
Updating a Trouble Ticket
Sometimes, additional information or changes need to be added to an existing online trouble ticket system.
- Add New Details: If you discover new information that could help resolve the issue, update the ticket. This can include new error messages or changes in the problem's behavior.
- Follow Up: If there has been no response for an extended period, follow up on the ticket to ensure it hasn't been overlooked.
Escalation Process

If an online trouble ticket is not resolved within a reasonable time, escalating the issue can help.
- Know When to Escalate: If the problem is critical and affecting business operations, escalate the ticket. This typically involves notifying a supervisor or selecting an escalation option in the ticketing system.
- Provide Justification: When escalating, explain why it is urgent. This helps the higher-level support team understand the impact and prioritize appropriately.
Suggested ReadingL: Ticket Generation
Resolving Trouble Tickets
Effectively resolving a trouble ticket ensures that issues are addressed promptly and thoroughly. Following the correct steps, confirming the resolution, and properly closing the ticket are essential parts of the process.
Steps to Resolution
To resolve a trouble ticket software, follow these steps carefully:
- Diagnose the Problem: Analyze the information provided in the ticket. Check error messages, system logs, and any attachments to understand the issue.
- Implement a Solution: Apply the necessary fixes. This could involve updating software, replacing hardware, or adjusting system settings.
- Test the Fix: After implementing the solution, test to ensure the problem is resolved. Verify that the issue no longer occurs and that the system functions correctly.
Confirming Resolution
Once the issue appears to be resolved, it is important to confirm with the ticket submitter:
- Notify the User: Inform the user that the issue has been addressed. Provide details on the steps taken to resolve the problem.
- User Verification: Ask the user to check and confirm that the issue is indeed resolved. This step ensures there are no lingering problems and that the solution is satisfactory.
- Feedback: Request feedback on the resolution process. This helps improve future troubleshooting and support efforts.
Closing the Ticket
After confirming the resolution, the final step is to properly close the trouble ticket:
- Document the Resolution: Record the steps taken to resolve the issue in the ticketing system. This documentation helps in case similar issues arise in the future.
- Close the Ticket: Mark the ticket as closed in the system. This indicates that the issue has been fully resolved and no further action is required.
Frequently Asked Questions (FAQs)
How do I create a trouble ticket?
You can create a trouble ticket by accessing your company's IT support portal, emailing the support team, or calling the help desk.
What information should I include in a trouble ticket?
Include a detailed description of the issue, any error messages, steps to reproduce the problem, and your contact information.
How long does it take to resolve a trouble ticket?
Resolution times vary depending on the complexity of the issue. Simple issues might be resolved in minutes, while more complex ones can take days.
Can I track the status of my trouble ticket?
Yes, most IT support systems allow users to track the status of their trouble tickets through an online portal or email updates.
What should I do if my trouble ticket isn't resolved?
If your ticket isn't resolved in a timely manner, follow up with the support team through the original submission method, providing your ticket number for reference.
