


WhatsApp Bot vs Telegram Bot: Which is better?
Updated at Oct 23, 2026
10 min to read
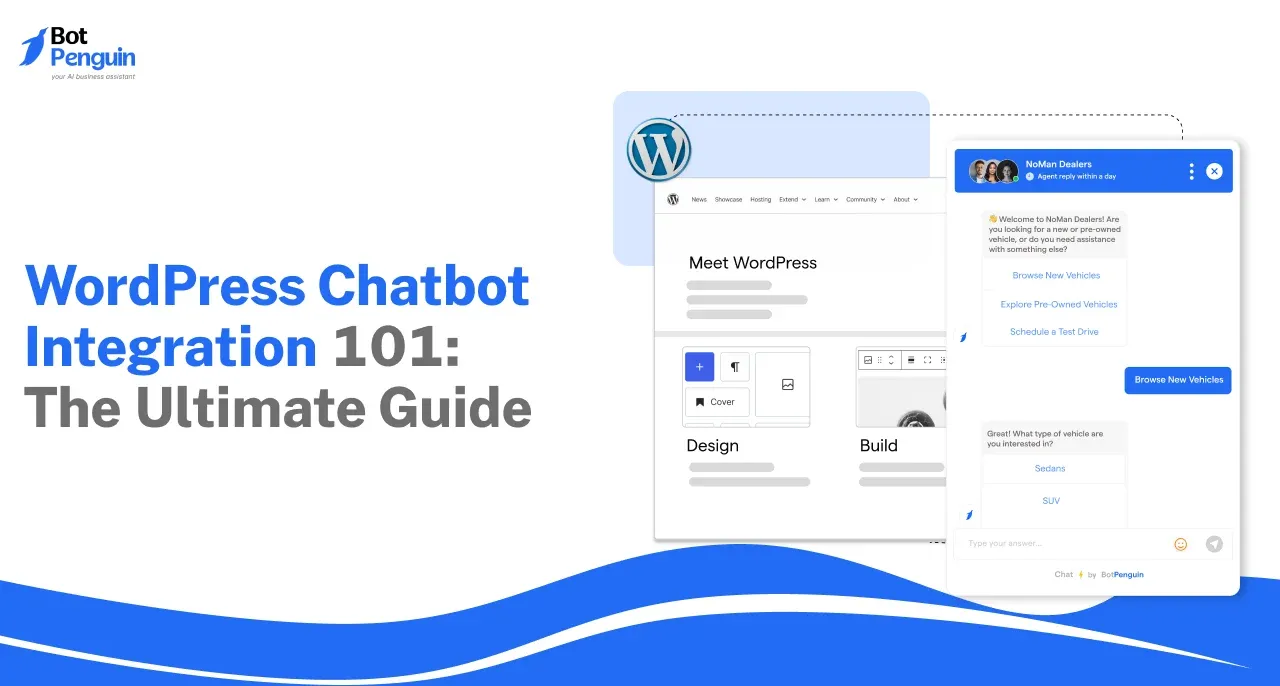
WordPress chatbot integration links your chatbot with tools like CRMs, calendars, and analytics. This setup lets information flow between your chatbot and your business systems. Leads go straight into your pipeline. Appointments land on your calendar. Every important action stays connected to each visitor.
A chatbot can answer questions and collect visitor details on its own. But often, that information just sits in the chatbot dashboard.
Integration connects every conversation to the tools your team already uses. A captured lead goes straight into your CRM. A booking request lands on your calendar while you chat.
This guide assumes you already have a chatbot installed on WordPress or picked out. (Still deciding? See the benefits of adding a chatbot to your WordPress site.)
You will learn what these connections do and how to set them up. We will also cover common problems that can interrupt your data flow.
First, let’s see what your chatbot can actually connect with.
A chatbot integration creates a live connection between your chatbot and another business tool. Through this link, the chatbot can collect or pull information.
Before you pick an integration, decide what should happen after each visitor action. This step helps you choose the right tool and data for your chatbot.
The table below shows where each connection sends chatbot data and what it helps accomplish.
As per Salesforce, sales representatives spend 70% of their time on non-selling tasks, including administrative work and meeting preparation.
A CRM integration sends qualified lead information into your sales pipeline. Common fields include:
Without this connection, your team has to copy details from the chatbot dashboard by hand. That takes time and makes it easy to miss something important.
Field mapping tells the integration where each chatbot answer should land. For example, the chatbot’s “company size” answer might go into a custom CRM field.
CRM integration can also help with lead ownership. A workflow may assign leads by location, service interest, or company size.
Native CRM integrations such as HubSpot, Zoho CRM, and Salesforce are available on BotPenguin's King plan.
Calendly found that 43% of surveyed workers spend at least three hours each week scheduling meetings.
A calendar integration supports bookings inside the chatbot conversation. The chatbot can collect the visitor’s preferred date, time, and appointment type.
For example, you can explore BotPenguin's Google Calendar integration to connect supported appointment workflows with your calendar.
Depending on the supported connection, it may also:
Real-time availability stops two visitors from booking the same slot. This only works if you set up availability checks correctly.
A WordPress chatbot can guide visitors to your existing checkout or payment page through a secure link. In-chat payment collection is available on BotPenguin's WhatsApp chatbots only.
Common uses include:
Never collect sensitive card information in regular chatbot messages. Keep all payment details inside the payment provider's secure checkout.
Some businesses send chatbot data to an external communication or marketing tool. The connected tool then manages its own approved follow-up process.
This does not make email automation a native chatbot function. The chatbot collects and passes permitted information through a supported connection.
Before using this workflow, verify:
Do not assume every chatbot connects with every communication tool. Always check the latest integration directory before you plan your workflow.
Analytics integrations help measure what visitors do before, during, and after chatbot conversations.
You may track events such as:
These events can help identify where visitors stop progressing. They can also connect chatbot outcomes with wider website reporting.
BotPenguin supports Google Tag Manager workflows for website deployment and configured chatbot events. Those events can support tools such as GA4 and Meta Pixel through GTM. BotPenguin’s official integration page explains the available setup.
Not every connection works the same way. The available method usually falls into one of three categories.
Native integrations are often easier to maintain. APIs offer more control when a standard connector cannot support the required workflow.
Before choosing a connection method, confirm that the available chatbot features support your workflow. If you have not selected a tool yet, compare these WordPress chatbot plugins.
A reliable integration starts with a clear goal. If you connect tools without a plan, you often end up with missing or misplaced data.
The main process has four stages:
1. Choose the destination tool.
2. Authorize the connection.
3. Map the required fields.
4. Test the complete workflow.
Finish each stage before you move to the next.
Start with the result you want, not the available integration list.
A vague goal might be “connect the chatbot to our CRM.” A useful goal defines the exact action and information involved.
Consider these examples:
Write the trigger, action, and required information for each workflow.
This exercise prevents unnecessary connections. It also helps you spot missing chatbot questions before you start setting things up.
Next, verify that your chosen chatbot supports the required tool. Review the official integration directory instead of relying on old blog posts.
You should also confirm:
Check if the connection is one-way or two-way. One-way connections only send information. Two-way connections can also pull information back from the other tool.
The BotPenguin WordPress integration connects website conversations to supported business tools. Confirm the required connector before building the chatbot flow. You can also examine BotPenguin reviews when evaluating how the product fits an existing workflow.
Authorization gives the chatbot limited permission to communicate with another tool.
Open the integration settings inside your chatbot dashboard. Select the required tool and begin its connection process.
The destination tool may open its own login or authorization screen. Sign in with an account that has the necessary permissions.
Check every requested permission before you accept it. Do not give more access than your workflow needs.
A CRM connection may request permission to:
A calendar connection may request permission to:
Record the account used for authorization. Your team should know who owns the connection and when it was created.
Some tools issue access tokens with limited lifetimes. Others may revoke access after password or security changes.
After you authorize, check that the connection shows as active. Remember, active status only means access is granted. It does not prove your workflow works yet.
Field mapping matches the information the chatbot collects with fields in the destination tool.
Suppose the chatbot collects these answers:
The connected CRM or calendar may use different field names. You must match each chatbot field with its correct destination.
A basic CRM mapping might look like this:
Check the expected data type for every destination field. A date field cannot always accept ordinary text. A number field may reject symbols or words.
Dropdown fields also require exact accepted values. The chatbot might collect “Small Business,” while the CRM expects “SMB.”
Standardize these values before you send them. If you don't, records might fail or appear in your CRM with blank fields.
Also decide how the workflow handles existing contacts. Possible rules include:
If you create a new record every time, your CRM can fill up with duplicates. If you update every match, you might overwrite valuable information.
Choose the rule that matches your sales process. Then test it with both new and existing contacts.
Avoid placing confidential details inside general notes fields. Review BotPenguin’s chatbot security practices before transferring customer data between connected tools.
Do not just test if the connection is active. Test the full journey a real visitor would take.
Start with a test record you can control. Use contact details your team can spot and remove. Go through the chatbot conversation on your WordPress site. Follow every step, and do not use dashboard shortcuts.
Then check the destination tool.
Confirm that:
Test more than the successful route. Use missing, invalid, and duplicate information.
For a CRM connection, test:
For a calendar connection, test:
For a payment connection, test:
Give visitors a helpful message when something fails. A vague “something went wrong” doesn't tell them what to do next.
A better failure message tells visitors what they can do next. It might offer another slot, let them retry, or ask if they want help from a human.
Testing shows your workflow works before launch. Monitoring makes sure it keeps working after you go live.
Review integration activity regularly. Look for failed records, missing fields, duplicate contacts, and unexpected gaps in bookings.
Track useful operational measures, including:
Check the connection after you change passwords, update security, or switch account owners.
Test the integration after you change chatbot questions. Renaming or removing a question can break your field mapping.
Documentation should include the connection owner, mapped fields, test cases, and recovery steps.
Review relevant chatbot case studies to see how businesses connect conversations with operational outcomes.
An integration can look active but still send the wrong or incomplete information.
The following problems cause many chatbot workflows to fail.
Incorrect mapping sends information into the wrong field or prevents record creation.
A phone number might enter a company field. A service selection might disappear because its destination field rejects the value.
Check both field names and data types. Just because labels look similar does not mean they do the same thing.
To fix the problem:
1. Complete a new test conversation.
2. Record the value produced by each chatbot question.
3. Compare every value with its destination field.
4. Correct mismatched types or accepted values.
5. Repeat the test with a new record.
Don't reuse the same test contact repeatedly. Old data can hide whether your new mapping actually worked.
An expired token can stop the data exchange even when the chatbot remains active.
This often follows:
Reconnect the tool through its approved authorization process. Then repeat the complete test journey.
The connected account may allow reading records but block creation or updates.
Review the account’s role inside the destination tool. Confirm it can perform every action required by the workflow.
Give only the permissions needed for the job. Too many permissions can create unnecessary security risks.
Duplicate records usually appear when the workflow creates contacts without checking existing identifiers.
Email addresses and phone numbers commonly serve as matching fields. However, your CRM rules may use another identifier.
Decide if your workflow should create, update, merge, or stop when it finds a match. Try to use the same rule for every lead source.
A booking may display one time to the visitor and another time to the employee.
Confirm the time zone used by:
Always save the final appointment with a clear time zone. Do not rely on dates and times without labels.
Some connectors process actions after a short delay. Others retry failed actions based on their own rules.
Do not promise instant record creation unless your integration can actually deliver it.
Check the integration history or connector logs. Look for rejected fields, account limits, permission failures, and service outages.
A visitor should not reach a dead end because an external tool failed.
Create a fallback response for each important integration action. The fallback might:
Do not show technical details, tokens, account names, or internal errors in your messages.
When data stops moving, check these items in order:
This checklist helps you determine whether the problem is with your chatbot or another tool.
Once your integration works well, write down the final setup. This record will help your team answer common questions later.
A WordPress chatbot can connect with supported CRMs, calendars, analytics tools, and third-party automation connectors. It can also direct visitors to an external checkout page. Available actions depend on the chatbot and destination tool. Before configuring a workflow, confirm whether the connection can only send information or can also retrieve and update existing data.
Not always. Many native integrations and third-party connectors use guided authorization and field mapping, so you don't need code. However, custom API or webhook connections may need technical support. Review the supported connection method, available actions, and required permissions before choosing how to connect your CRM.
Your chatbot data may be blocked by incorrect field mapping, missing permissions, rejected field values, or expired authorization. Check the integration history for errors first. Then submit a new test record and compare each collected value with its mapped destination field in the CRM.
Yes, if your chatbot supports the required calendar connection. Depending on the integration, it may create events, retrieve availability, or confirm bookings. Verify its supported actions, working hours, buffers, time zones, and conflict-management rules before allowing visitors to schedule appointments through the chatbot.
A properly configured integration should not noticeably delay ordinary chatbot conversations. However, actions involving external tools may take additional time or occasionally fail. Test the full workflow under realistic conditions, and provide a fallback message when the connected CRM, calendar, payment tool, or connector doesn't respond.
A good WordPress chatbot integration moves useful information beyond the chat. It connects what visitors do with the tools you use for sales, bookings, payments, and reports.
The process has four steps. Pick your destination tool, authorize access, map your fields, and test the whole workflow.
Do not stop when you see an active connection. Test real visitor journeys, failure paths, duplicate records, permissions, and time zones.
The right connection should support a real business action. Do not add integrations just because they show up in a directory.
BotPenguin supports connections across CRM, calendar, payment, analytics, and other tool categories through its official integrations directory. Confirm your required tool and actions before configuring the workflow.
Connect Every WordPress Conversation
Send chatbot leads, bookings, and customer data into the business tools your team already uses with BotPenguin each day.
Start Integrating TodayCheckout our related blogs you will love.
Updated at Oct 23, 2026
10 min to read
Updated at Oct 16, 2026
8 min to read
Updated at Oct 15, 2026
7 min to read
Updated at Oct 13, 2026
17 min to read

Updated at Oct 12, 2026
15 min to read

Updated at Oct 6, 2026
9 min to read
Table of Contents

