We often wish for abilities to automate various tasks, making our lives simpler. Like scheduling messages on WhatsApp.
It's an undeniably useful feature, yet it's conspicuously absent from the app. But don't let that deter you because we have your back!
In this guide, you'll learn a simple and efficient method to schedule a WhatsApp message on Android.
Whether you want to be the first to wish your friend a happy birthday, share an important update with your team, or just manage your messages better, scheduled messaging is the answer.
But we all know that plans can change, and so can your scheduled messages. That’s why this guide also covers how you can disable any scheduled messages in a jiffy.
Ready to schedule your first whatsapp message?
The Need to Schedule WhatsApp Messages
Be it wishing a friend happy birthday right at midnight, or sending vital business info when it's convenient for colleagues in a different timezone, scheduling messages can enable us to communicate timely without having to battle with human forgetfulness.
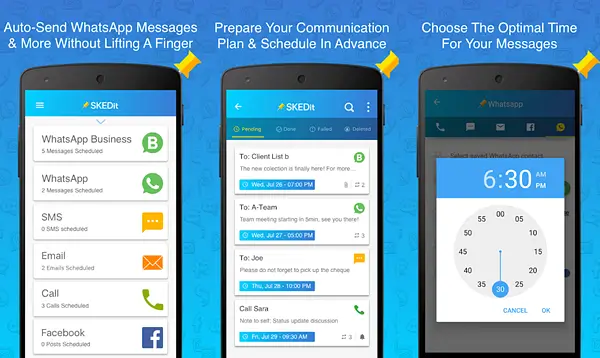
Using SKEDit – A Scheduling Powerhouse
Given that WhatsApp doesn't have a built-in scheduler, we must resort to third-party apps that make this possible. A popular choice is SKEDit, a free Android app that allows you to schedule WhatsApp messages and other tasks also.
How to Schedule WhatsApp Messages on Android?
All you need is an Android Device, WhatsApp & SKEDit. Let’s dive in…..
Step 1: Download SKEDit from Google Play Store. Search for 'SKEDit' and hit the install button.
Step 2: After installing, open the app and create a new account with your email address or Facebook account.
Step 3: To schedule WhatsApp messages, grant SKEDit access to your contacts, allowing you to choose who you want to schedule a message for.
Step 4: From the app’s dashboard, select the WhatsApp icon. The app will guide you through the necessary steps to schedule a WhatsApp message on your android device.
Step 5: You are led to a selection page. Here, choose the person or a group to whom the message needs to be sent.
After picking the recipient, it's time to compose the message. Ensure the accuracy and content as it will be sent as scheduled and rectifications after that are impossible.
After drafting the message, designate the specific time and date for the message delivery.
You might find the 'Ask me before sending' option useful. It gives you a chance to review the message before it's sent.
Finally, hit 'Schedule'. Your WhatsApp message is now scheduled using SKEDit on your Android device.
Step 6: Navigate to your phone's settings, find "accessibility", and enable SKEDit. This last step is crucial to ensure that SKEDit has the necessary permissions to send the message at the scheduled time.
How to Disable the Scheduled Message?
Even the best-laid plans sometimes need to change. If you have a scheduled WhatsApp message but decide that it's not appropriate or necessary, you can cancel it.
Here's how:
Step 1: Open the SKEDit app, where you scheduled your WhatsApp message.
Step 2: Navigate to the 'Scheduled' tab, located right next to the 'Activity' tab on the home screen.
Step 3: You will see a list of all your scheduled messages here. Find the WhatsApp message you want to disable.
Step 4: Upon locating the message, simply swipe it to the left. A red 'Delete' button should appear.
Step 5: Press this button, which will lead to a prompt for confirmation to delete this entry.
Step 6: Confirm, and your scheduled WhatsApp message will be successfully disabled.
Remember, you cannot recover the message once it is deleted. Ensure you wish to cancel the scheduled message before completing this action.
Being able to schedule a WhatsApp message on Android opens up new avenues of convenience; the power to disable them when necessary is as essential. With these simple steps, you are in full control of your messaging schedule.
Wrapping it Up
Now you are fully equipped to handle not just timely messaging but also any changes to those plans. With just a few simple steps, you can effectively schedule a WhatsApp message on your Android device or disable it altogether if needed.
Stay tuned for more amazing insights, until next time!