

Stripe Chatbot Integration: Boost Online Checkout Experience
Updated at Jun 2, 2026
9 min to read

Want to take your business to the next level? Integrating payments into your chatbot can increase sales and create seamless customer experiences.
After all, it's the time of online transactions that happens in seconds.
This guide will walk you through everything you need to know to easily enable frictionless transactions in your conversational interface. We’ll explore the benefits of combining chatbots and streamlined checkout, including increased conversion rates and enhanced CX.
You’ll learn how to optimize your chatbot’s payment flow to smoothly guide customers from product selection to confirmed purchase. We’ll also outline the quick setup process to start accepting payments in your chatbot today.
Whether you’re looking to improve analytics, reduce abandoned carts, or create the ultimate personalized purchasing experience, this guide has you covered.
Follow along step-by-step to transform your business with intelligent chatbot payments now.
Stripe is a leading online payment processing platform that enables businesses to accept payments securely and efficiently.
With its robust infrastructure and developer-friendly tools, Stripe simplifies payment integration.
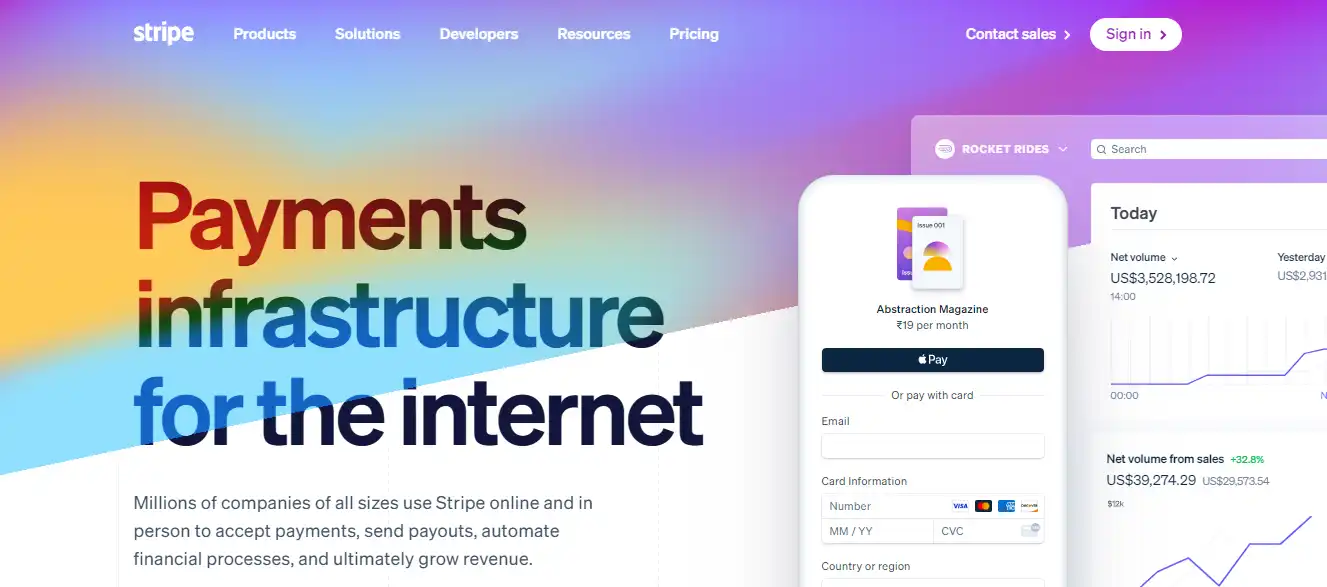
As it allows businesses to manage transactions, subscriptions, and invoices seamlessly across various digital channels.
In the previous section, we learned about what Stripe is. Now, let's dive into setting up a Stripe account and configuring the necessary settings to tailor the chatbot payment experience to your business.
To get integrated with Stripe, follow these step-by-step instructions to create your account:
Head over to the Stripe website and click on the "Sign Up" button to start the registration process.
Fill out the required information, including your email address, company name, and country of residence.
Take your time carefully entering accurate details as this information will be used for verification purposes. Stripe takes security seriously!
Once you've entered the necessary information, Stripe will send a verification email to your provided address.
Check your inbox and click on the verification link to confirm your email and proceed with the setup.
After verifying your email, you'll be prompted to provide additional details about your business, such as your website URL, business type, and banking information.
Stripe may require additional verification steps, such as submitting identification documents or providing business documentation. Follow the instructions provided by Stripe to complete the identity verification process.
Remember, the accuracy of the information you provide during registration is crucial, as it helps ensure compliance with payment industry regulations.
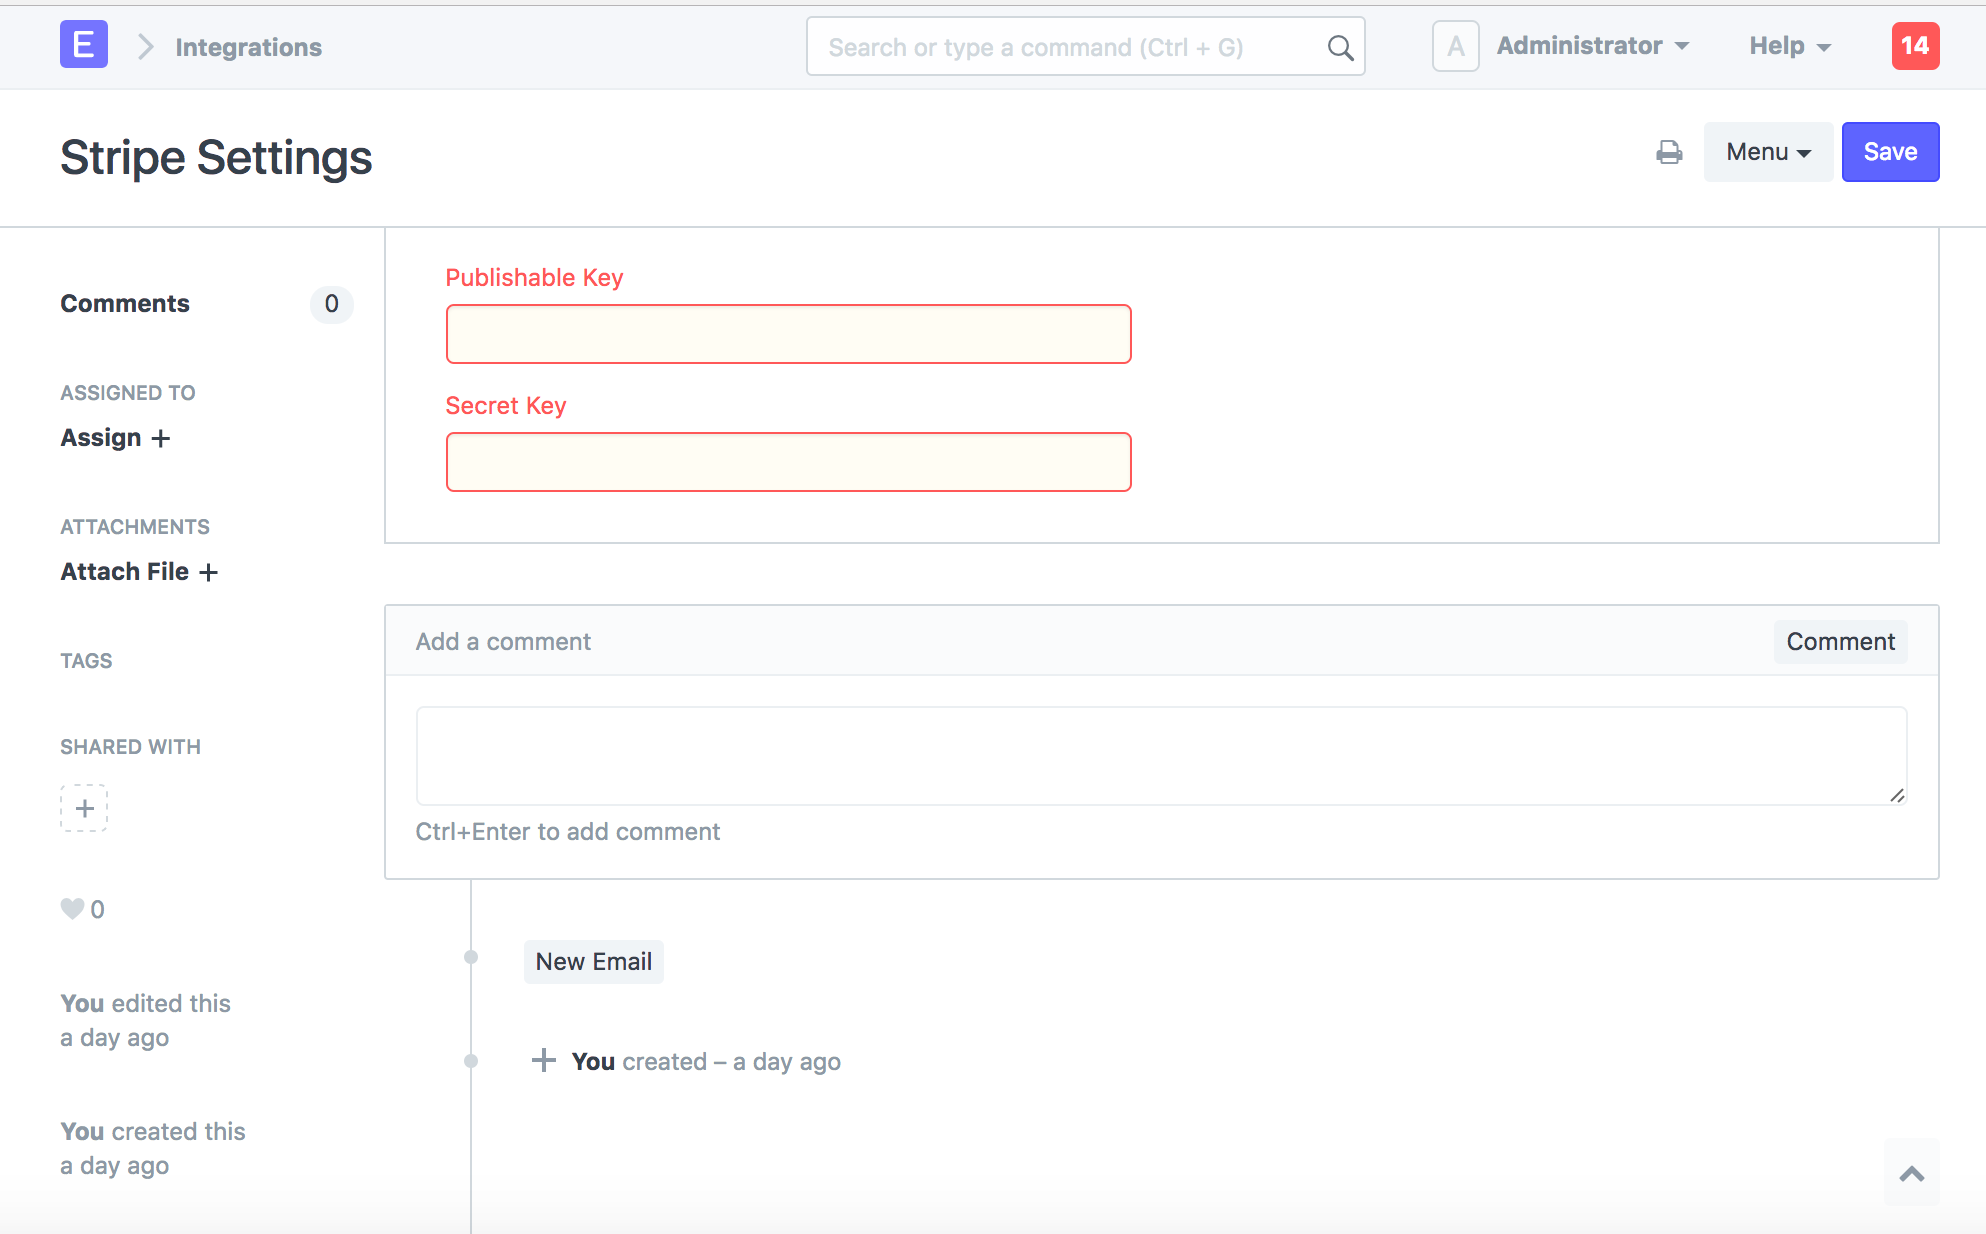
Once you have successfully created your Stripe account, it's time to configure the settings to suit your business needs.
Here are the important settings you should pay attention to in your Stripe dashboard:
Confirm business details: Ensure your company name, address, and contact info are accurate on receipts.
Payment flexibility: Customize Stripe for diverse payment methods like credit cards, digital wallets, and options such as Apple Pay or Google Pay.
Global transactions: Pick from 135+ currencies supported by Stripe, facilitating smooth international transactions.
Tailored notifications: Set up personalized alerts for successful payments, transaction failures, and subscription renewals.
Enhanced security: Fortify your account with Stripe's security features, such as two-factor authentication and fraud prevention tools, ensuring robust protection against fraudulent activities.
By taking the time to configure these settings, you can adapt Stripe to your business's unique requirements and provide a tailored payment experience to your customers.
Now, let's explore the various integration options Stripe offers and how you can seamlessly integrate Stripe into your website or application.
Here's a brief overview of the process:

Create an account on the Stripe website. Provide the required information and complete the registration process.
Depending on your platform and technical expertise, you can choose from different integration options, such as Stripe's client libraries or plugins for popular programming languages.
Follow the installation instructions provided by Stripe to set up the Application Programming Interfaces (API).
Once your account is set up, log in to the Stripe Dashboard to configure your account settings.
This includes setting your preferred currency, defining payment methods, and customizing other parameters according to your business needs.
To integrate Stripe, you'll need to add the necessary code snippets to your site or app. Stripe provides detailed documentation and guides to help you through this process.
Whether using Stripe Elements, Checkout, or building custom forms, Stripe has options to suit your needs.
Before going live, it's important to test your Stripe integration thoroughly.
Stripe provides a testing environment where you can simulate transactions and ensure everything works as expected.
Use the provided test cards and tools to verify that payments are being processed correctly.
Stripe provides different integration options, each with its own advantages and use cases.
Let's take a look at the three main integration methods: Stripe Checkout, Stripe Elements, and API integration.
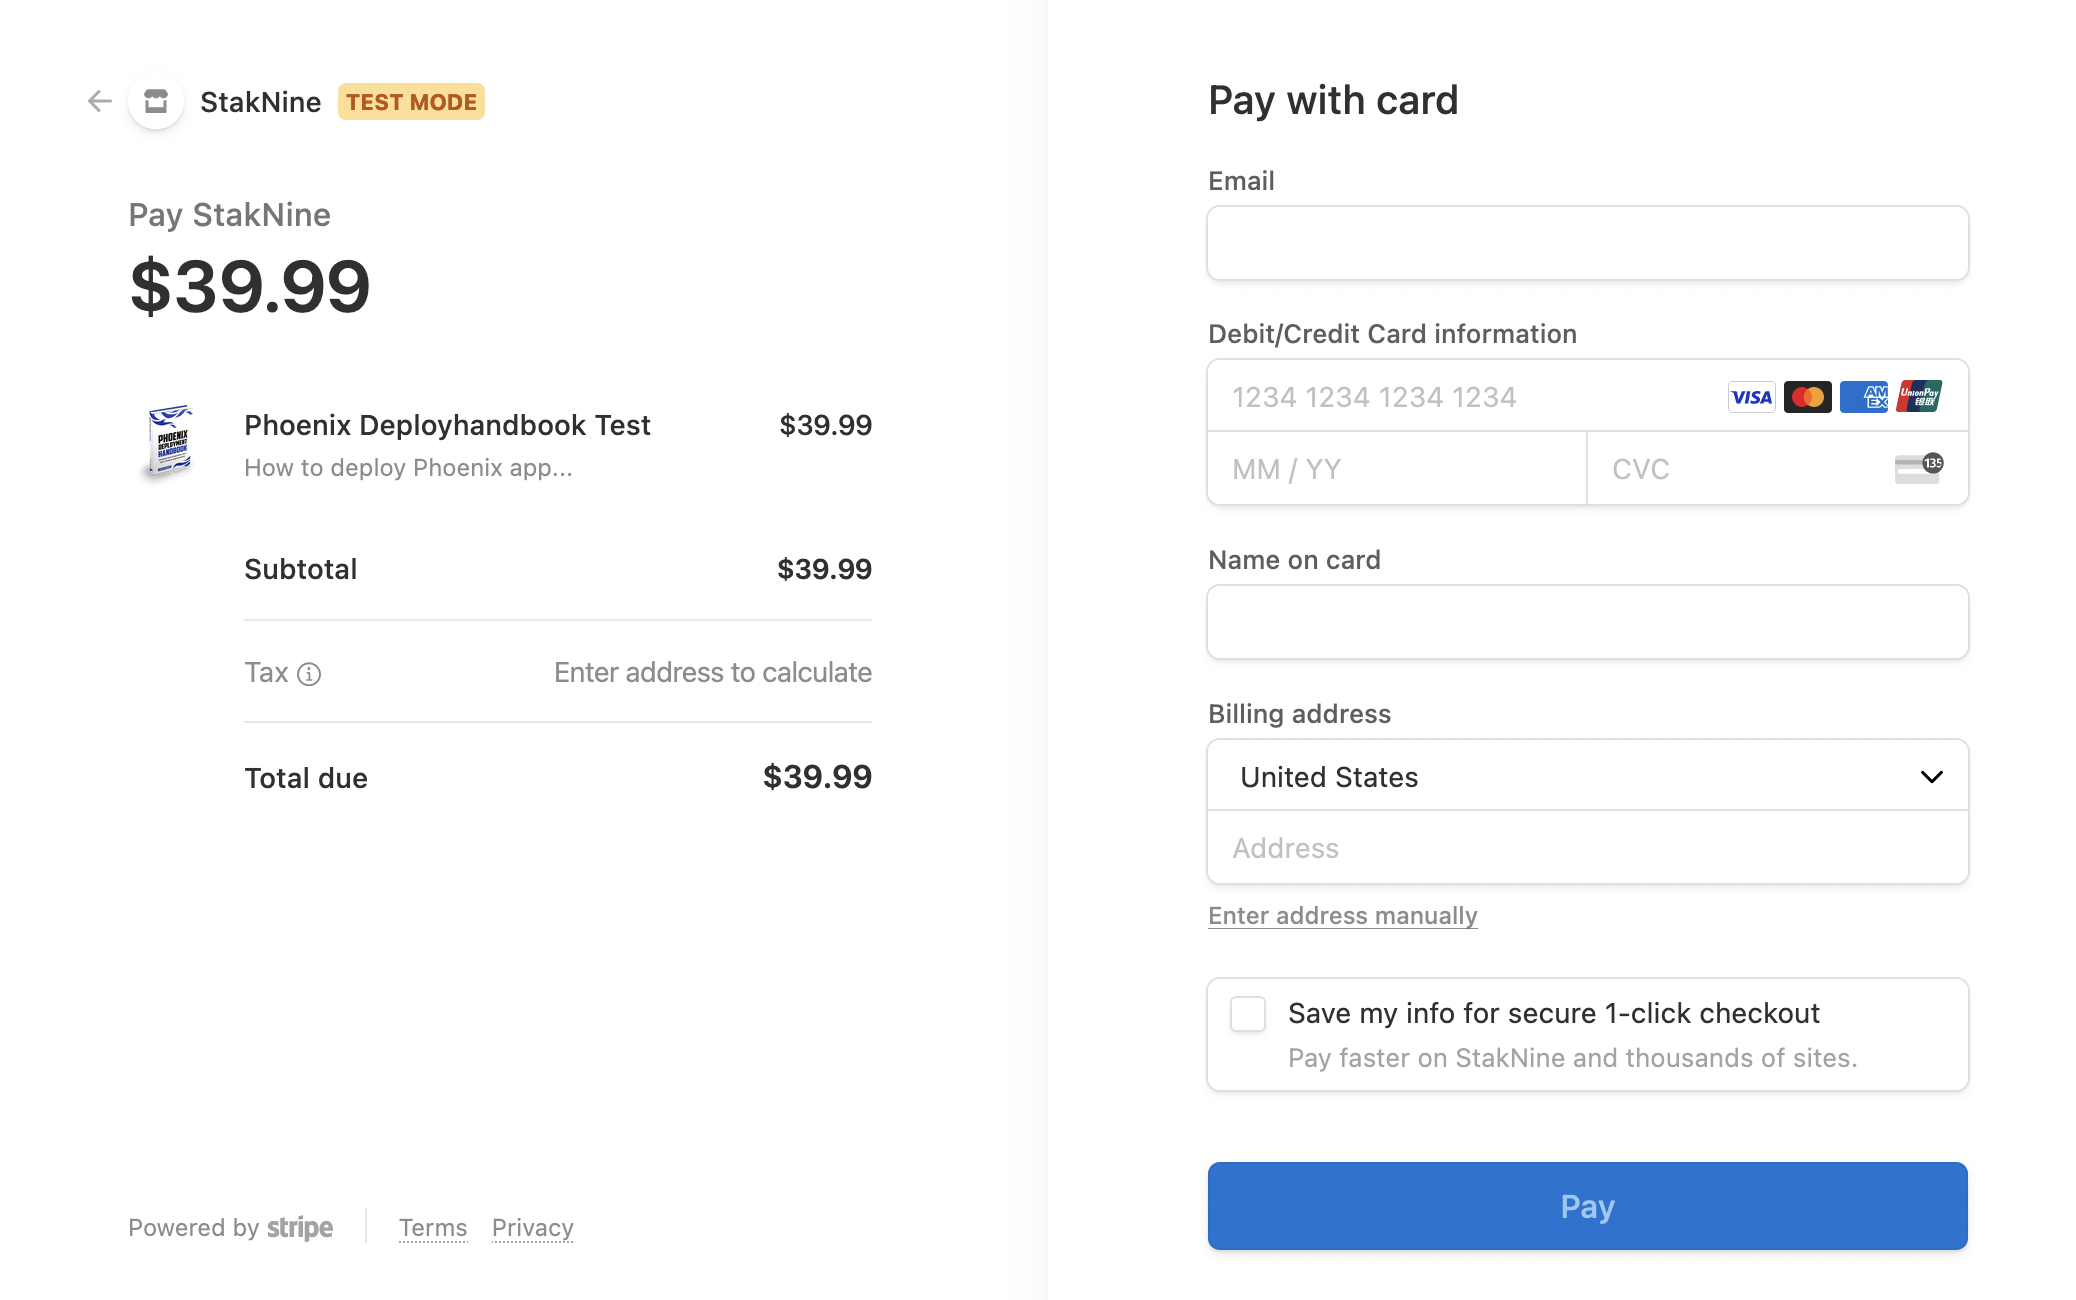
Stripe Checkout is a prebuilt, hosted payment page that allows you to quickly add a payment form to your website without much technical knowledge.
It provides a seamless and secure user experience, as the payment flow is handled entirely by Stripe.
Stripe Elements is a set of prebuilt UI components that allow you to build customized payment forms on your website or application.
Elements give you more control over the design and user experience while still benefiting from the security and infrastructure provided by Stripe.
For more advanced customization and control, integrating Stripe using its APIs allows you to build a fully customized payment flow tailored to your business needs.
API integration provides the most flexibility and allows you to control every aspect of the payment process.
When choosing the right integration method, consider factors such as your technical expertise, desired level of customization, and the complexity of your payment flow.
If you're looking for a simple and quick integration, Stripe Checkout is the way to go. Here's a step-by-step guide on how to integrate with Stripe Checkout into your website:
In your Stripe Dashboard, generate the necessary checkout code by customizing the payment options, appearance, and other parameters as per your requirements.
Copy the generated code snippet and paste it into your website's HTML where you want the payment form to appear.
Before going live, thoroughly test the Stripe Checkout integration using Stripe's testing environment.
For the most flexibility and control, you can integrate Stripe directly into your website or application using their APIs.
Here's an overview of the process:
Familiarize yourself with Stripe's API documentation to understand the available endpoints, parameters, and authentication methods.
Implement the necessary API calls on your server-side code to create charges, handle refunds, and manage other payment-related tasks.
Suggested Reading:
Stripe Chatbot Integration: Boost Online Checkout Experience
Ensure you handle errors and exceptions properly to provide a smooth user experience. Implement error handling and fallback mechanisms to handle potential issues during the payment process.
API integration requires a deeper understanding of programming and web development, so it's recommended for developers with coding experience.
Next, we will see how to manage payments.
Congratulations on successfully integrating Stripe into your website or application!
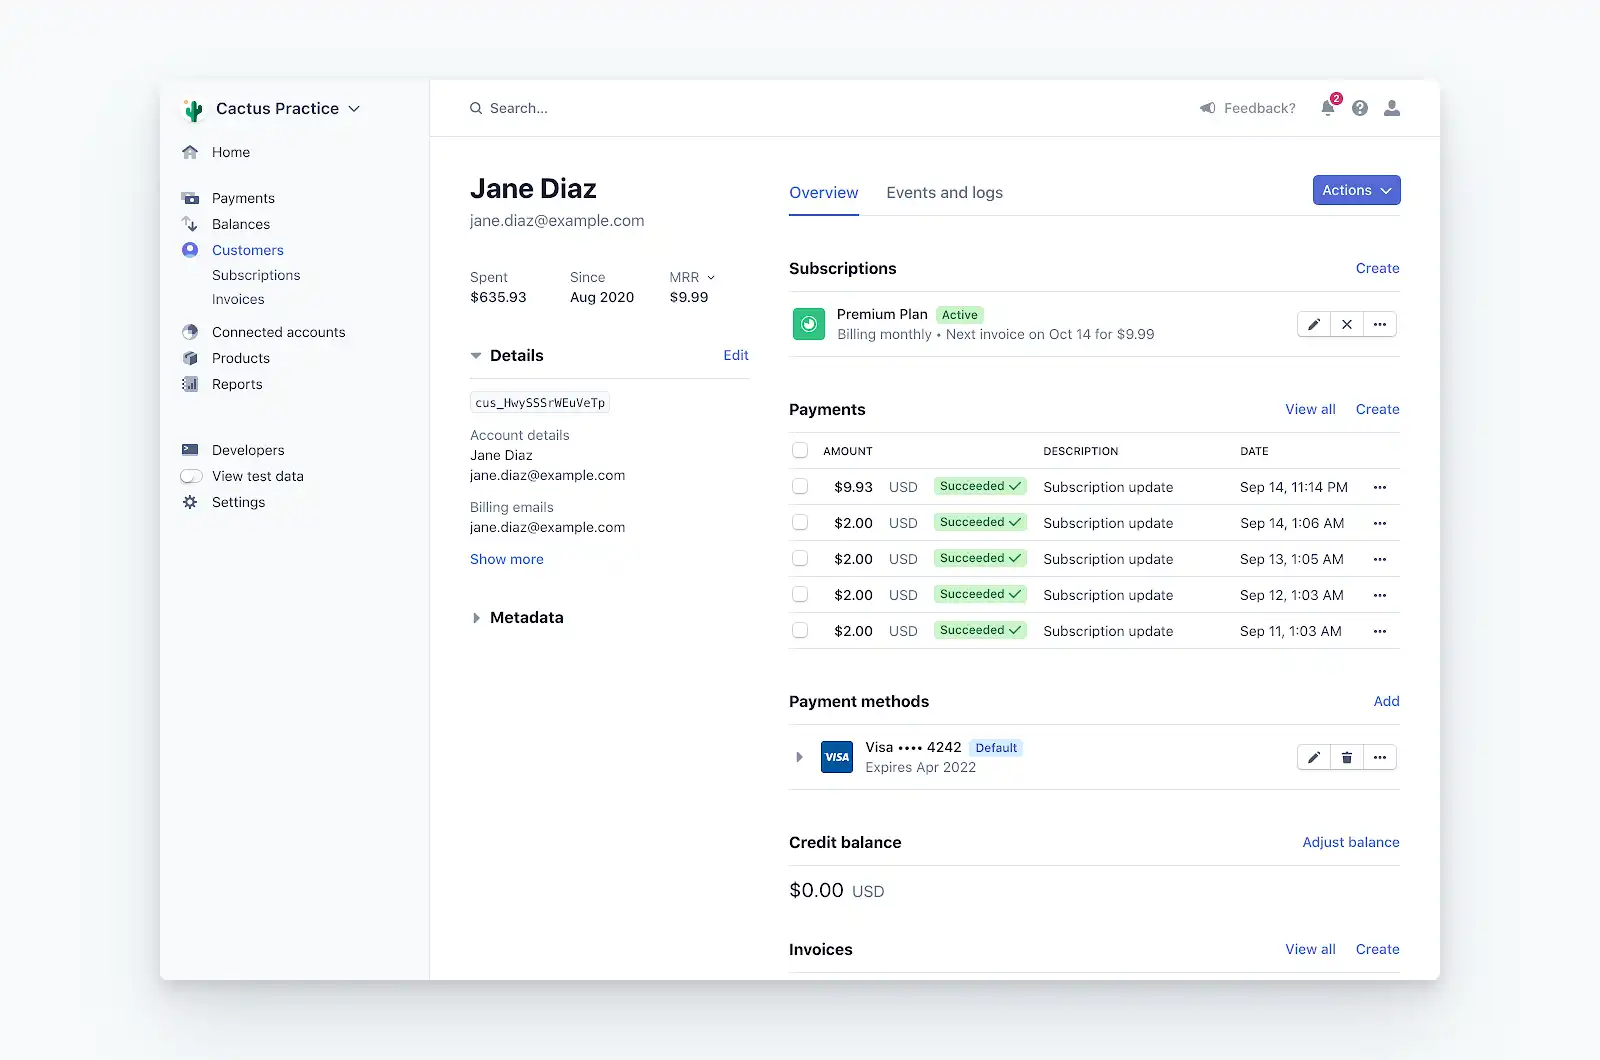
Now it's time to dive into the Stripe Dashboard and explore its key features for managing payments, handling refunds, and analyzing payment data.
The Stripe dashboard is the central hub for managing payments, customers, subscriptions, and analyzing data.
Key sections include:
Payments - View, search, and refund transactions.
Customers - Manage customer data, cards, and subscription plans.
Subscriptions - Create, update, cancel recurring subscriptions.
Reporting - Customizable reports on revenue, payments, etc.
Integrate Stripe checkout, elements, or API into your site. When customers submit payment, Stripe processes it securely. Display confirmations and handle post-payment logic.
Locate the payment in the dashboard and initiate a refund. Choose a full/partial amount. Communicate with customers on refund status.
Using dashboard reports to track revenue, transactions, etc over time. Export data to spreadsheets for deeper analysis. Integrate with other analytics tools for a comprehensive view.
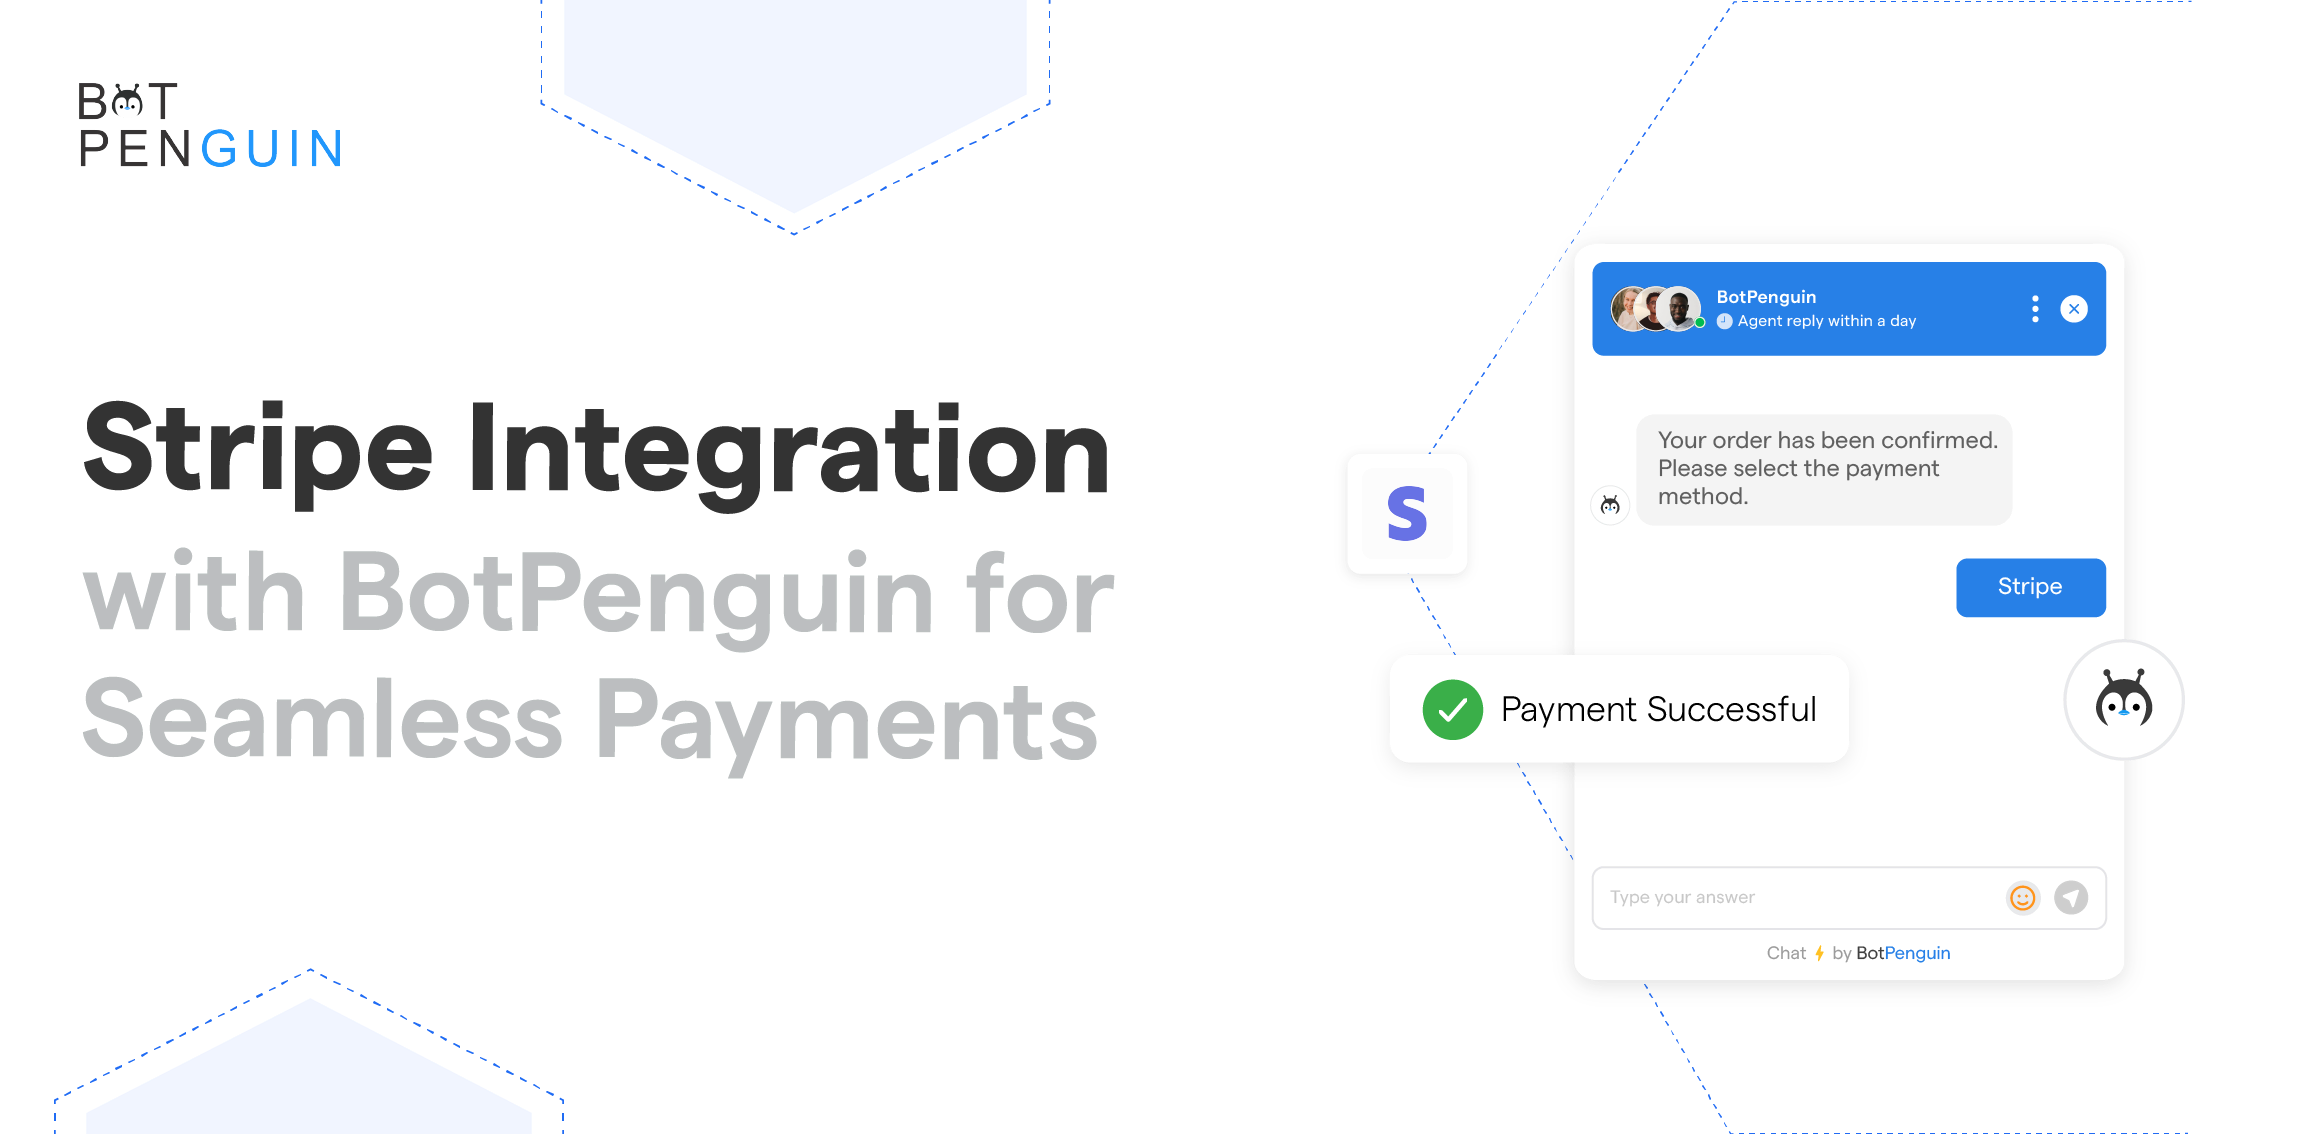
Next, we will see how BotPenguin chatbot integration with Stripe payment work together.
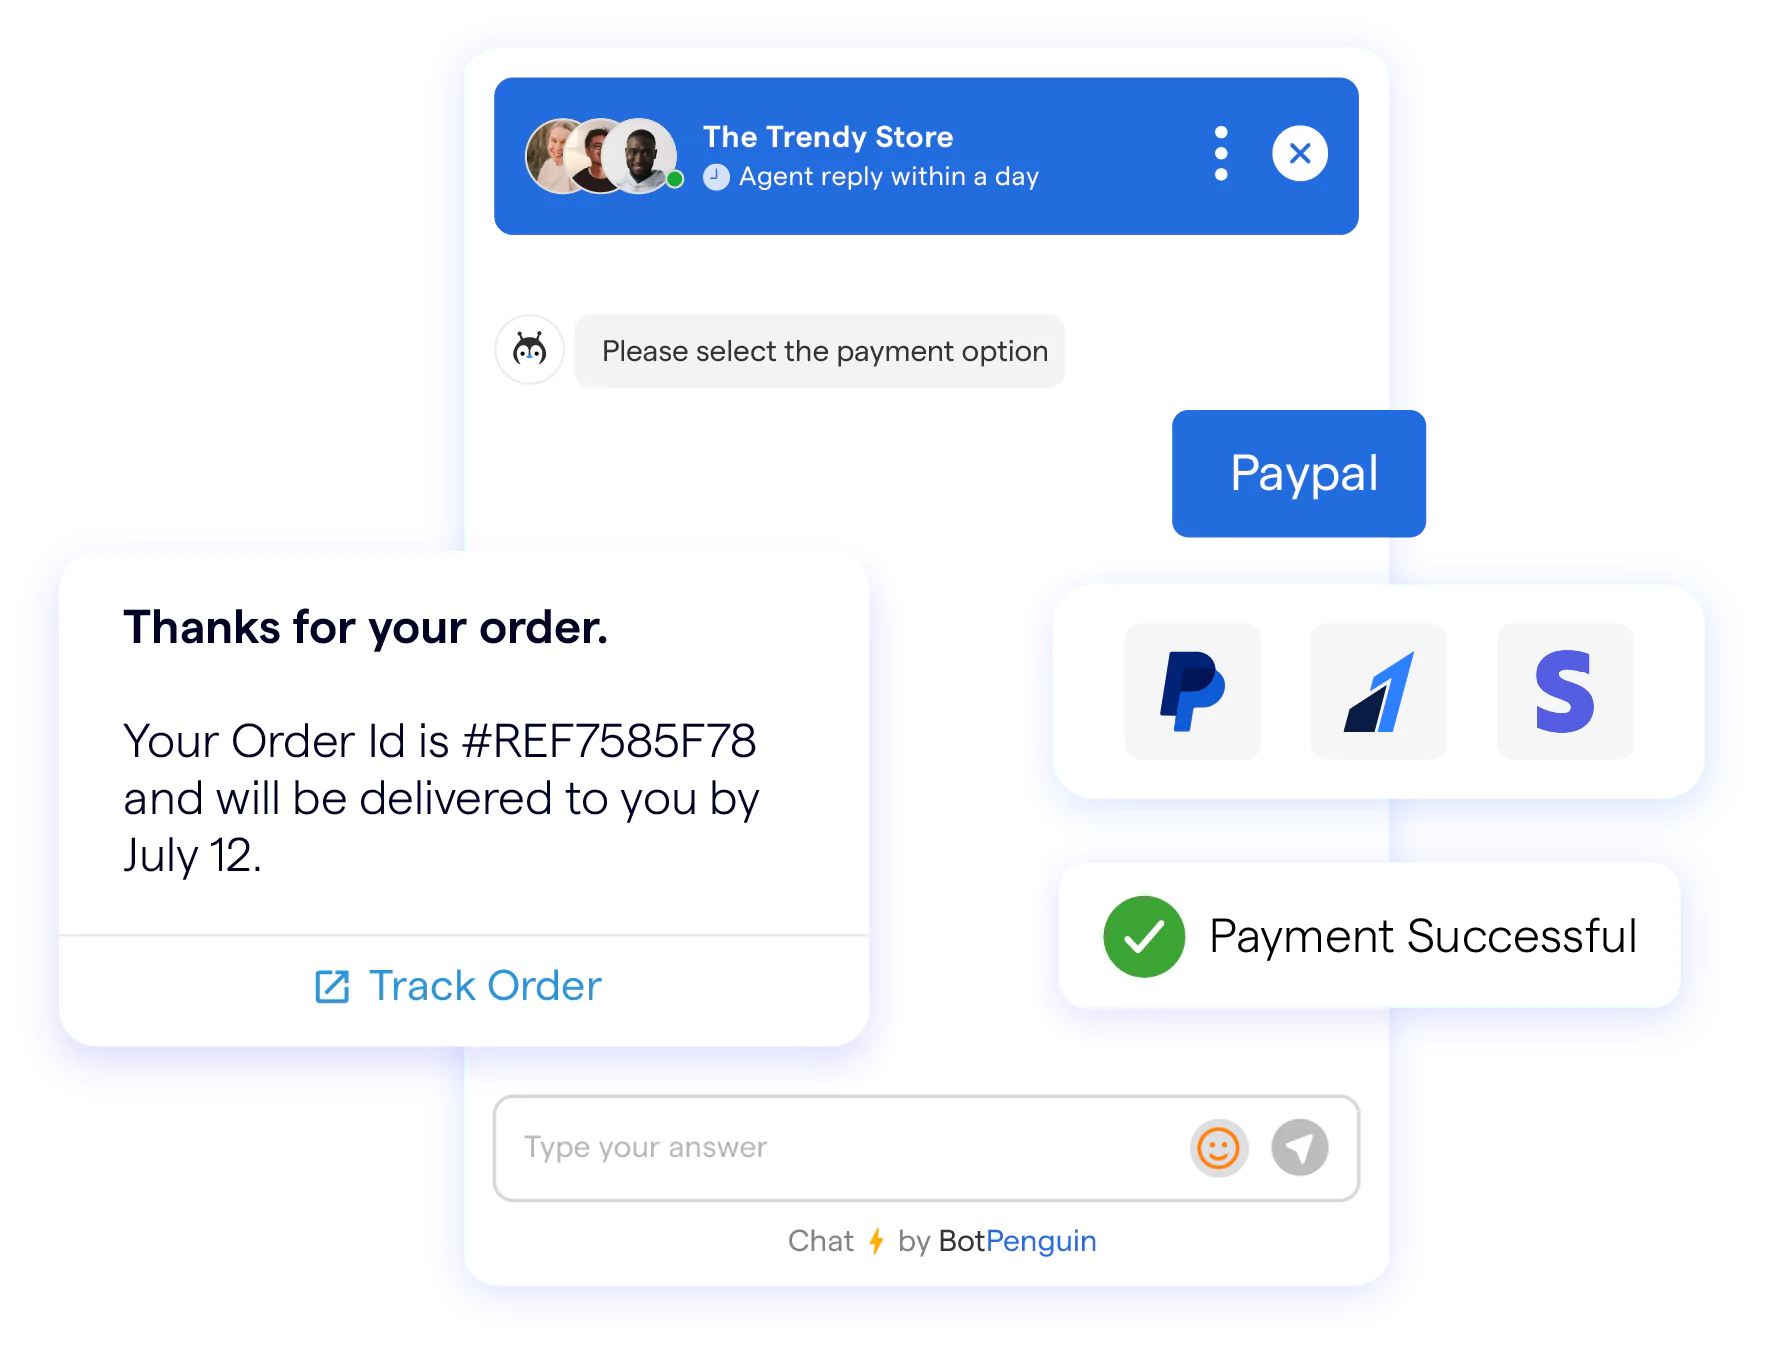
Accepting payments should be simple for both businesses and customers.
With BotPenguin's seamless integration with Stripe, you can easily add frictionless payments into your conversational chatbot.
This allows you to deliver incredibly smooth transactions that convert more customers.
The benefits are the following:
Increased conversion rates - Chatbots with integrated payments see higher completion of purchases thanks to the simplified checkout flow.
Enhanced customer experience - Customers appreciate the speed and convenience of paying in a conversational interface without cumbersome distractions.
Valuable analytics - Gain data-driven insights into your sales funnel and customer behavior through Stripe's detailed metrics and analytics.
Quick setup - Get up and running fast by enabling Stripe through BotPenguin's simple integration that requires no coding.
Follow these:
Offer clear payment options early in the conversation to prime customers to purchase.
Make sure conversational prompts seamlessly guide users to payment.
Utilize confirmation messages and error handling to prevent abandoned carts.
Let customers conveniently select shipping and contact info for faster checkout.
In conclusion, integrating Stripe with a chatbot offers online business owners and developers a powerful solution to streamline payments effectively.
By incorporating this integration, businesses can provide their customers with a seamless and convenient payment experience, ultimately enhancing customer satisfaction and increasing conversion rates.
Through the implementation of chatbot Stripe integration, businesses can leverage the efficiency of automated conversations to facilitate transactions smoothly.
This not only reduces the time and effort required for payment processing but also minimizes the potential for errors. It ensures a reliable and secure payment gateway for customers.
The Stripe dashboard is a powerful tool for efficiently managing transactions, gaining insights, and creating seamless customer experiences.
Stripe dashboard centralizes payment management and assists in smooth payment acceptance and refunds. Its reporting provides actionable insights. It also Regularly analyzes data to optimize business.
Transforming your customer experience doesn't have to be hard. With BotPenguin's seamless Stripe integration, you can quickly empower your chatbot to handle payments in natural conversational interfaces.
Join thousands of businesses delighting customers with the power of intelligent chatbots. Sign up now to integrate frictionless payments using Stripe and watch your business grow.
Stripe Integration lets you connect your payment system directly to your website or app, making the payment process seamless and efficient for you and your customers.
Yes, Stripe Integration allows you to accept payments from various sources, including credit cards, digital wallets, and even Bitcoin, making it convenient for customers to pay using their preferred method.
Absolutely! With Stripe Integration, you can monitor transactions in real-time, ensuring full visibility into the payment process and staying informed about any issues or fraudulent activities.
Stripe Integration is designed to prioritize security. It uses advanced fraud prevention technology, encryption, and compliance with industry standards to protect sensitive payment information, providing peace of mind for you and your customers.
Stripe offers reliable support through various email, phone, and chat channels. Their support team is available to help you with any issues or questions, ensuring a smooth integration process and ongoing assistance.
Subscribe to Our Newsletter
Get the latest business insights straight into your inbox.
Checkout our related blogs you will love.
Updated at Jun 2, 2026
9 min to read
Updated at May 19, 2026
10 min to read
Updated at Apr 16, 2024
9 min to read
Updated at Jul 17, 2026
8 min to read

Updated at Jul 14, 2026
5 min to read

Updated at Jul 13, 2026
9 min to read
Table of Contents