Introduction
Have you ever wished for an AI that feels like it was tailor-made just for you? Forget waiting for OpenAI to release the next custom GPT model.
Welcome to the world of OpenAI’s GPT Builder, where that wish can become a reality. You can make your own custom GPT right now.
Imagine crafting a custom GPT that not only understands your needs but also evolves to meet them perfectly. Whether you’re looking to enhance customer interactions, generate engaging content, or provide specialized support, this is the right place to start.
This guide will take you through the surprisingly simple steps to create custom GPT. You don’t need to be a tech expert or spend years mastering coding—just follow along, and you’ll have your custom GPT up and running in no time!
Let’s get started on this exciting journey to create custom GPT!
How to Create a Custom GPT in OpenAI's GPT Builder
Follow these straightforward steps to create and customize your own unique custom GPT model using OpenAI’s GPT Builder.
Step 1
Access OpenAI’s GPT Builder
To create your own custom GPT model, the first step is gaining access to the GPT Builder platform within OpenAI’s system. Here’s how you can get started
Sign Up or Log in to OpenAI
Start by signing up or logging in to OpenAI to access the GPT Builder and begin customizing your model.
If you already have an account, simply visit OpenAI's website and log in using your existing credentials.
For new users, you’ll need to create an account. Click on the "Sign Up" button, enter your email, set a password, and verify your email to complete the registration process.
Ensure that your account has the necessary permissions for custom GPT, as not all subscription levels may offer access to advanced features like custom model building.
Navigate to the GPT Builder
Once logged in, head to the GPT Builder in the custom gpt API Dashboard to start crafting your custom GPT model.
Once logged in, head to the API Dashboard to make your custom gpt API.
From the dashboard, look for the GPT Builder tab or link. This is typically found in the navigation panel under "Models" or "Customizations."
Click on the GPT Builder link to start the customization process.
Understand GPT Builder Features
Before diving in, familiarize yourself with the features and tools available in the GPT Builder.
The GPT Builder allows you to select base models, fine-tune instructions, upload datasets, and tweak response settings. You can also preview the changes you make in real time.
Review any tutorials or documentation. OpenAI provides to understand best practices when using the Builder.
Step 2
Select a Base Model
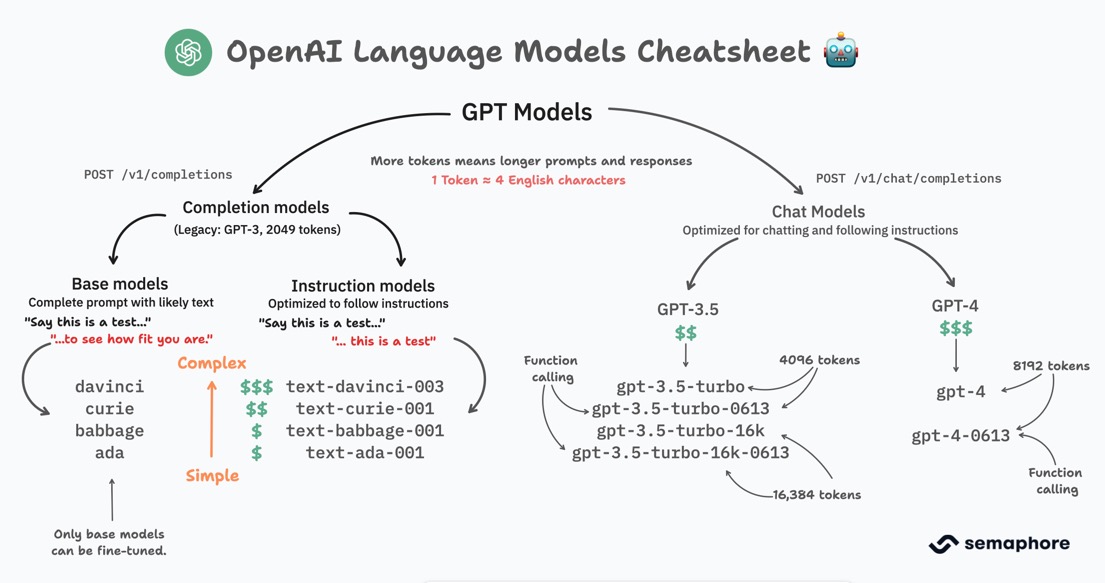
Choosing the right base model is crucial to building a custom GPT that suits your needs.
OpenAI offers different versions of GPT models, each with varying capabilities. Here’s how to proceed
Understand the Model Options
Familiarize yourself with the available GPT models, such as GPT-3.5 and GPT-4, to choose the best one for your needs.
GPT-3.5 Known for fast performance and lower costs, suitable for general tasks like customer support or content creation.
GPT-4 Offers superior reasoning and comprehension skills, ideal for more complex use cases such as technical writing or advanced problem-solving.
Review the differences in model performance, including processing speed, memory, and cost, to determine which base model best fits your project.
Consider Your Use Case
Identify your specific use case to ensure the custom GPT model you select aligns with the tasks you want it to perform.
Identify the specific application for your custom GPT. For instance
Creative Writing GPT-3.5 might suffice for generating engaging, creative content.
Professional Consultation GPT-4 is more appropriate if your custom GPT needs to provide accurate and contextually rich responses in fields like law or healthcare.
Align your choice with the complexity and accuracy required for your use case.
Select the Model in GPT Builder
Choose the appropriate GPT model from the available options in the custom GPT Builder to begin the customization process.
- Once you've evaluated your needs, select the model from the available list in the GPT Builder.
- OpenAI will present the models in a dropdown or selection grid. Click to choose the model that matches your requirements.
Step 3
Define Your Custom Instructions
This step is where you give the GPT its personality and purpose.
Custom instructions guide how your custom GPT will interact, respond, and behave, ensuring it aligns with your unique needs.
Clarify the Purpose
Define the specific purpose of your custom GPT to ensure it provides the right responses for your intended use case.
Determine what you want your GPT to achieve. Is it for customer service, content generation, or expert consultation? Knowing the goal helps you shape clear instructions.
For example, if your GPT is intended for e-commerce support, you might instruct it to provide friendly, concise, and accurate product information.
Customize the Tone and Style

Set the desired tone and style for your GPT, whether formal, casual, or conversational, to match your brand's voice.
Define the tone you want the GPT to use. Should it be formal, casual, humorous, or empathetic? This customization ensures the GPT speaks in a voice that fits your brand or use case.
Example “Respond in a friendly, conversational tone suitable for tech-savvy users.”
Developing a Distinct Personality
To captivate users, your Custom GPT should possess a distinct personality.
Consider the tone, language style, and overall demeanor that will resonate with your target audience, making the AI interaction more engaging and memorable.
Creating a Memorable Name and Description
Choosing a fitting name and crafting a compelling description for your Custom GPT is crucial.
These elements contribute to its identity and help users understand its purpose and capabilities at a glance, setting the stage for a successful user experience.
Incorporating Specific Examples
In addition to clear instructions, incorporating specific examples or use cases can aid users in understanding how to effectively utilize your Custom GPT to meet their needs, boosting its relevance and value.
Step 5
Set Parameters for Responses
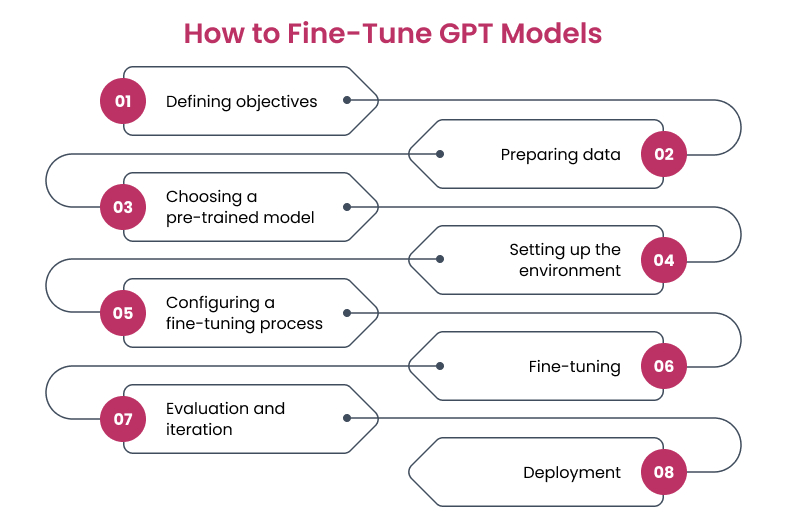
Fine-tuning the response parameters ensures your custom GPT behaves exactly how you want it to, from the length of replies to the level of creativity in responses.
Adjust Response Length
Control the length of the GPT’s responses to fit your needs, from brief answers to detailed explanations.
Define how long you want the GPT’s responses to be.
Short responses may work better for quick customer support, while longer, detailed answers may suit technical writing.
Set the Temperature
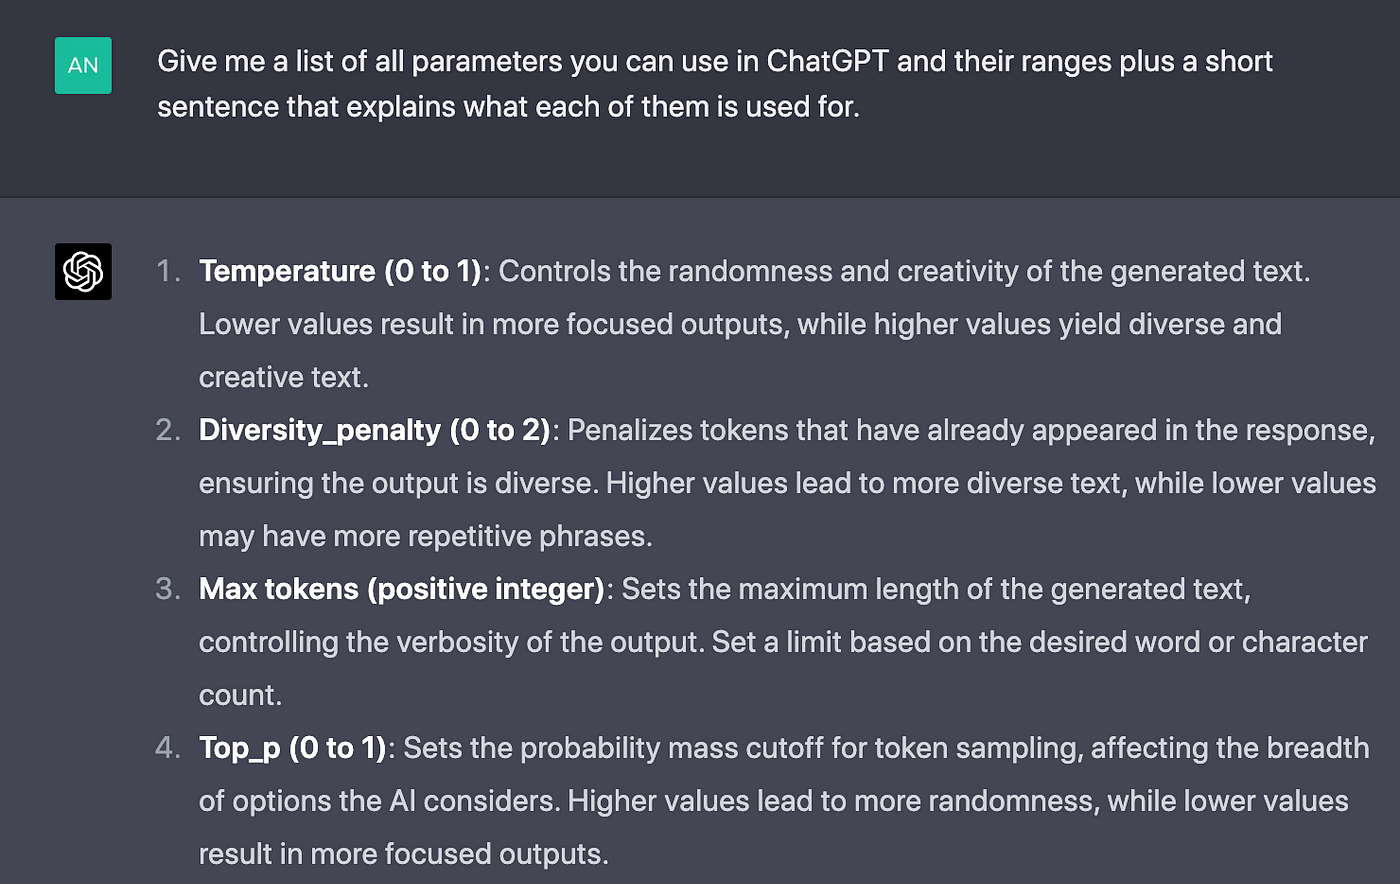
Adjust the temperature setting to control the creativity and variability of the GPT’s responses, from predictable to more imaginative.
The temperature controls how creative or random the responses are. A low temperature (e.g., 0.2) results in more deterministic and focused answers, while a high temperature (e.g., 0.8) encourages more creative or varied responses.
Choose a low temperature for fact-based tasks and a higher one for creative writing.
Control Specificity
Regulate the level of specificity in the GPT’s answers to match your needs for broad overviews or detailed insights
Tweak the GPT’s tendency to be either highly specific or more generalized in its responses.
This can be useful when you want the GPT to either provide broad overviews or deep, specific insights.
Enhancing GPT Knowledge
Equipping your Custom GPT with access to relevant and reliable information sources is vital for delivering accurate and informative responses to user queries, enhancing its overall knowledge base.
Suggested Reading:
Custom ChatGPT Plugins vs. GPTs: What No One is Telling You
Optimization for Specific Use Cases
Optimizing your Custom GPT for specific industries allows you to address industry-specific needs effectively.
Industries like healthcare or e-commerce can benefit from tailored GPT models that provide accurate information, personalized recommendations, and relevant responses.
Fine-Tune Response Format
You can instruct the GPT to follow a particular response format—such as bullet points, paragraphs, or conversational style—to match the expectations of your audience.
Step 6
Test the Model
Before deploying, thoroughly test your custom GPT to ensure it meets expectations.
Interact with the model by asking a range of questions or tasks based on your use case.
Evaluate responses for accuracy, relevance, and tone, ensuring they align with your custom instructions and parameters.
Refine instructions or settings if needed, tweaking response tone, length, or behavior based on test outcomes.
Ensure consistency by testing across various scenarios to confirm reliable performance.
Step 7
Deploy and Integrate
After testing and refining your custom GPT, the final step is deploying and integrating it into your desired platforms.
Deploy the Model
Deploy your custom GPT model through OpenAI’s platform, making it accessible for use in your chosen applications
Once you’re confident in the model’s performance, deploy it through OpenAI’s interface.
OpenAI will provide you with an API key that allows you to access and use the custom GPT in production environments.
Suggested Reading:
Get Your Custom ChatGPT Integrations with BotPenguin
Integrate into Your Systems
Integrate the deployed GPT model into your systems by embedding API calls, ensuring seamless interaction with your platforms
Use the API to integrate the GPT into your chosen platform, whether it’s a website, mobile app, chatbot, or internal tool.
For web-based applications, embed the API in your backend to allow users to interact with the GPT seamlessly.
Ensure your system supports the necessary API calls and responses for optimal interaction.
Configure for Use Cases
Customize the GPT’s functionality to fit your specific use cases, such as setting triggers or linking it with relevant data sources.
Customize the integration to suit your specific use case. This could include setting triggers for when the GPT responds, adjusting user interaction points, or linking the model with existing databases for context.
For example, in a customer service app, you can configure the GPT to handle incoming queries and provide real-time support.
Test the Integration
Verify the GPT’s performance within your integrated system to ensure it functions correctly and meets your operational requirements
Once integrated, test how the GPT functions in the live environment. Ensure it interacts smoothly with users and performs according to the expectations set during testing.
Check for any issues with response times, accuracy, or unexpected behavior during real-world usage.
Step 8
Monitor and Iterate
After deployment, ongoing monitoring and refinement are crucial to maintaining and improving your custom GPT’s performance.
Monitor Performance

Gather feedback from users to gain insights into the GPT’s performance and identify opportunities for enhancement
Track key metrics such as response accuracy, user engagement, and system efficiency.
Use analytics tools to gather data on how well the GPT meets user needs and performs in different scenarios.
Collect User Feedback
Collect user feedback to understand their experience and pinpoint areas where the GPT can be improved
Gather feedback from users interacting with the GPT to identify areas for improvement.
Pay attention to common issues or suggestions for better functionality and user experience.
Analyze Data
Analyze performance data and user feedback to identify patterns and areas for refinement in your GPT model.
Review the performance metrics and user feedback to identify patterns and areas that need adjustment.
Focus on specific aspects where the GPT may be underperforming or where users express dissatisfaction.
Suggested Reading:
Why & How to Hire ChatGPT Consultants for Building GPT Tools
Refine and Update
Make necessary adjustments and updates to the GPT model based on your analysis to enhance its performance and relevance.
Based on the analysis, make necessary adjustments to the custom instructions, response parameters, or integration settings.
Implement updates and test them to ensure they improve performance without introducing new issues.
Iterate Regularly
Regularly iterate on the model to ensure continuous improvement and adaptation to evolving user needs and requirements.
Regularly repeat the monitoring and refinement process to keep the GPT aligned with evolving user needs and business goals.
Continuously iterate to enhance the GPT’s capabilities and ensure it remains effective and relevant.
Conclusion
And there you have it—a complete guide to crafting your own custom GPT using OpenAI’s GPT Builder! From selecting the right model to fine-tuning responses and integrating them smoothly into your systems, you're now equipped to create custom GPT that fits your needs.
Imagine having a GPT that seamlessly extends your team, handling tasks from customer support to content creation with precision.
Each step you take adds a personal touch, making your GPT not just functional but uniquely effective.
Creating your own custom GPT model may seem a bit overwhelming initially, but by following the steps outlined in this guide, you can craft a powerful and personalized AI that meets your specific needs.
By leveraging the platform's features and advanced customization options, you can create custom GPT that resonate with users, adding value to their lives and transforming the way they interact with digital technologies.
Remember, the journey doesn’t end with deployment. Keep monitoring performance, gathering user feedback, and making regular updates to ensure your GPT remains sharp and relevant.
So, take the plunge into GPT Builder, unleash your creativity, and start building something remarkable today!
Frequently Asked Questions (FAQs)
What are the key steps involved in creating a custom GPT using OpenAI's GPT Builder?
The key steps include defining the GPT's purpose, identifying the target audience, crafting a compelling persona, providing essential instructions, fine-tuning its behavior, enhancing its knowledge, and testing and refining the GPT.
Is programming knowledge required to create custom GPT with GPT Builder?
No, extensive programming knowledge is not necessary. GPT Builder offers a user-friendly interface that allows users to create custom GPT models without requiring in-depth coding skills.
How can user feedback be integrated into the development process of a custom GPT?
User feedback can be integrated by implementing feedback loops, conducting user surveys, allowing users to rate GPT responses, and analyzing feedback data to continually improve the GPT's capabilities based on user input.
What are some best practices for testing and refining a custom GPT created with GPT Builder?
Best practices include conducting initial tests to evaluate performance, analyzing GPT outputs for accuracy and relevance, and continuously gathering user feedback to refine and enhance the GPT based on insights.
How can a custom GPT be published and shared with a broader audience using platforms like the GPT Store?
By finalizing GPT settings for optimal performance, creating engaging visuals, preparing the GPT for distribution according to platform guidelines, and promoting it effectively through strategic marketing strategies across multiple channels.
